How To Crochet A Dog Collar: A Clear Step-By-Step Guide
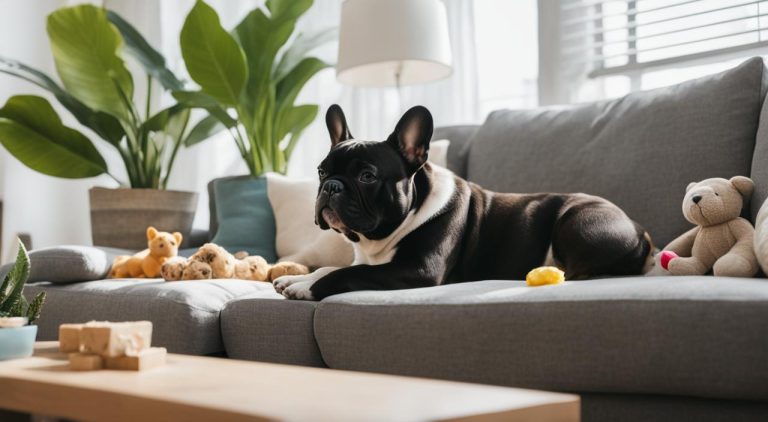
Crocheting a dog collar lets a pet owner create a custom fit with simple tools and basic skills. The process stays quick and flexible, and it works for dogs of many sizes. This guide shows how materials, stitches, and patterns come together into a safe and clean design.
To crochet a dog collar, they measure the dog’s neck, choose strong yarn and a hook, crochet a firm band with basic stitches, and secure it with a buckle or hardware. The steps stay simple and focus on comfort, strength, and size. With the right choices, the collar holds up to daily wear.
Along the way, they learn which yarn lasts longer, which stitches keep their shape, and how small details change the look. The guide also covers pattern options and easy ways to add color or small accents without affecting safety.
Essential Materials and Tools
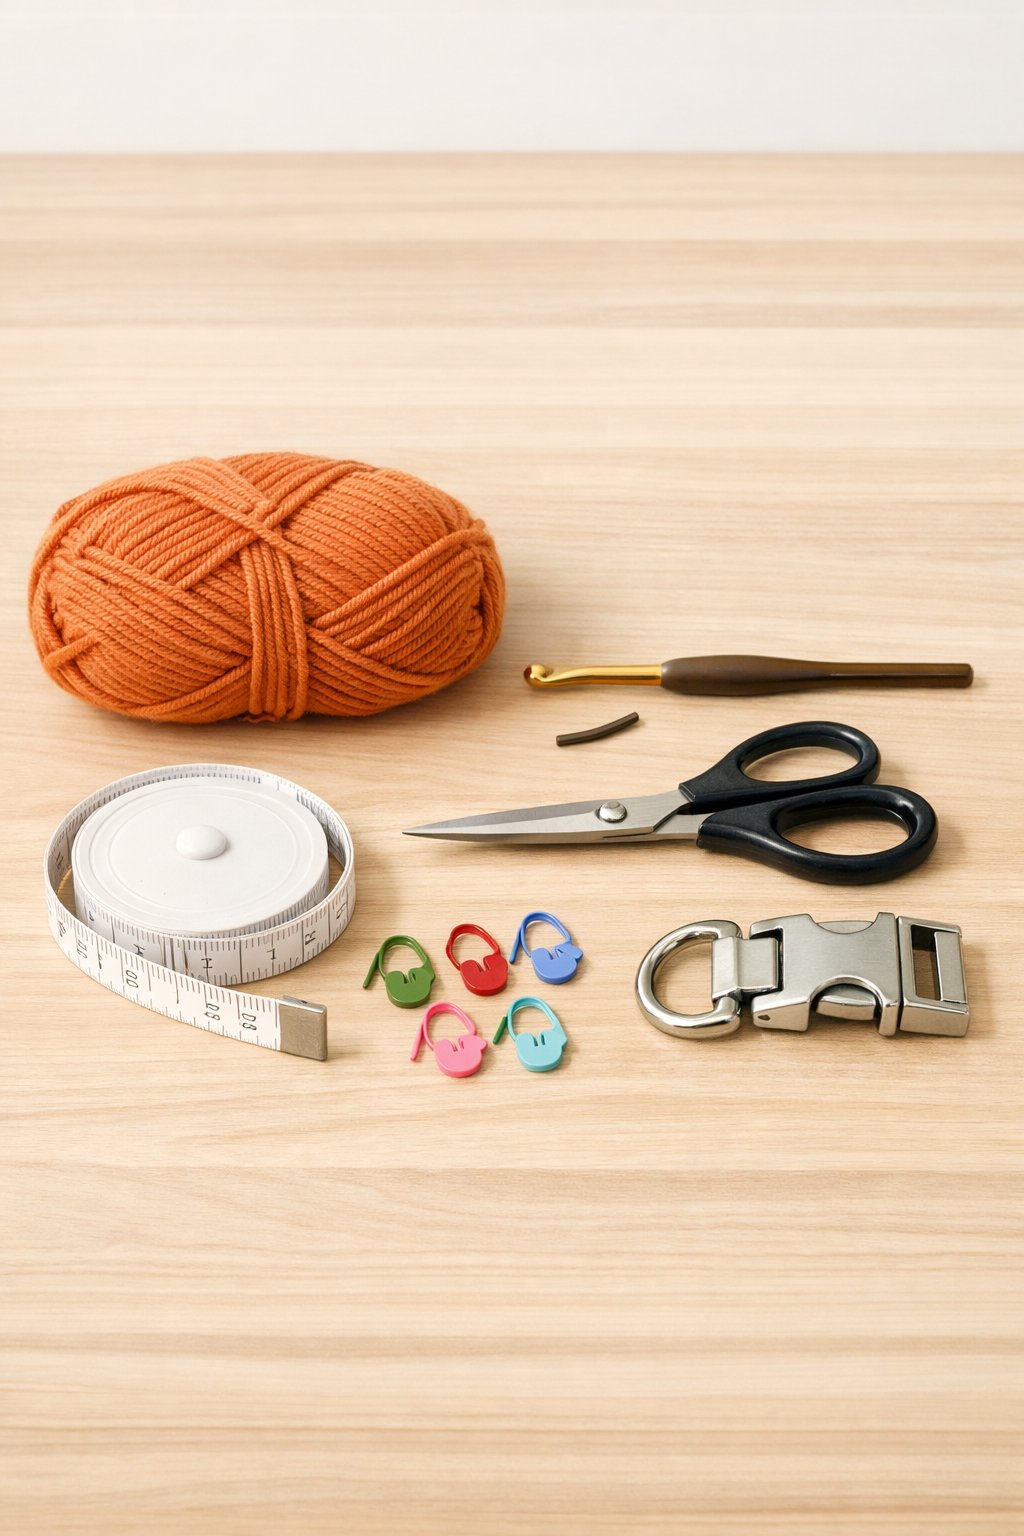
A dog collar needs strong yarn, the right hook size, and a few small tools to keep the work neat. Each item affects comfort, fit, and durability, so careful choices matter.
Choosing the Right Yarn and Colors
The yarn must handle daily wear, pulling, and washing. Worsted weight yarn works well because it balances strength and flexibility. Cotton yarn resists stretching and stays cool on the dog’s neck. Acrylic options, such as Caron One Pound yarn, offer durability and easy care.
Avoid fuzzy or loosely spun yarn. These wear down fast and can irritate skin. Smooth yarn keeps stitches firm and clean.
Color choice affects safety and style. Bright colors help the collar stand out during walks. Dark shades hide dirt but reduce visibility at night. Many makers add a small amount of polyester fiberfill only if the pattern includes padding, but most collars stay flat without it.
Selecting a Crochet Hook
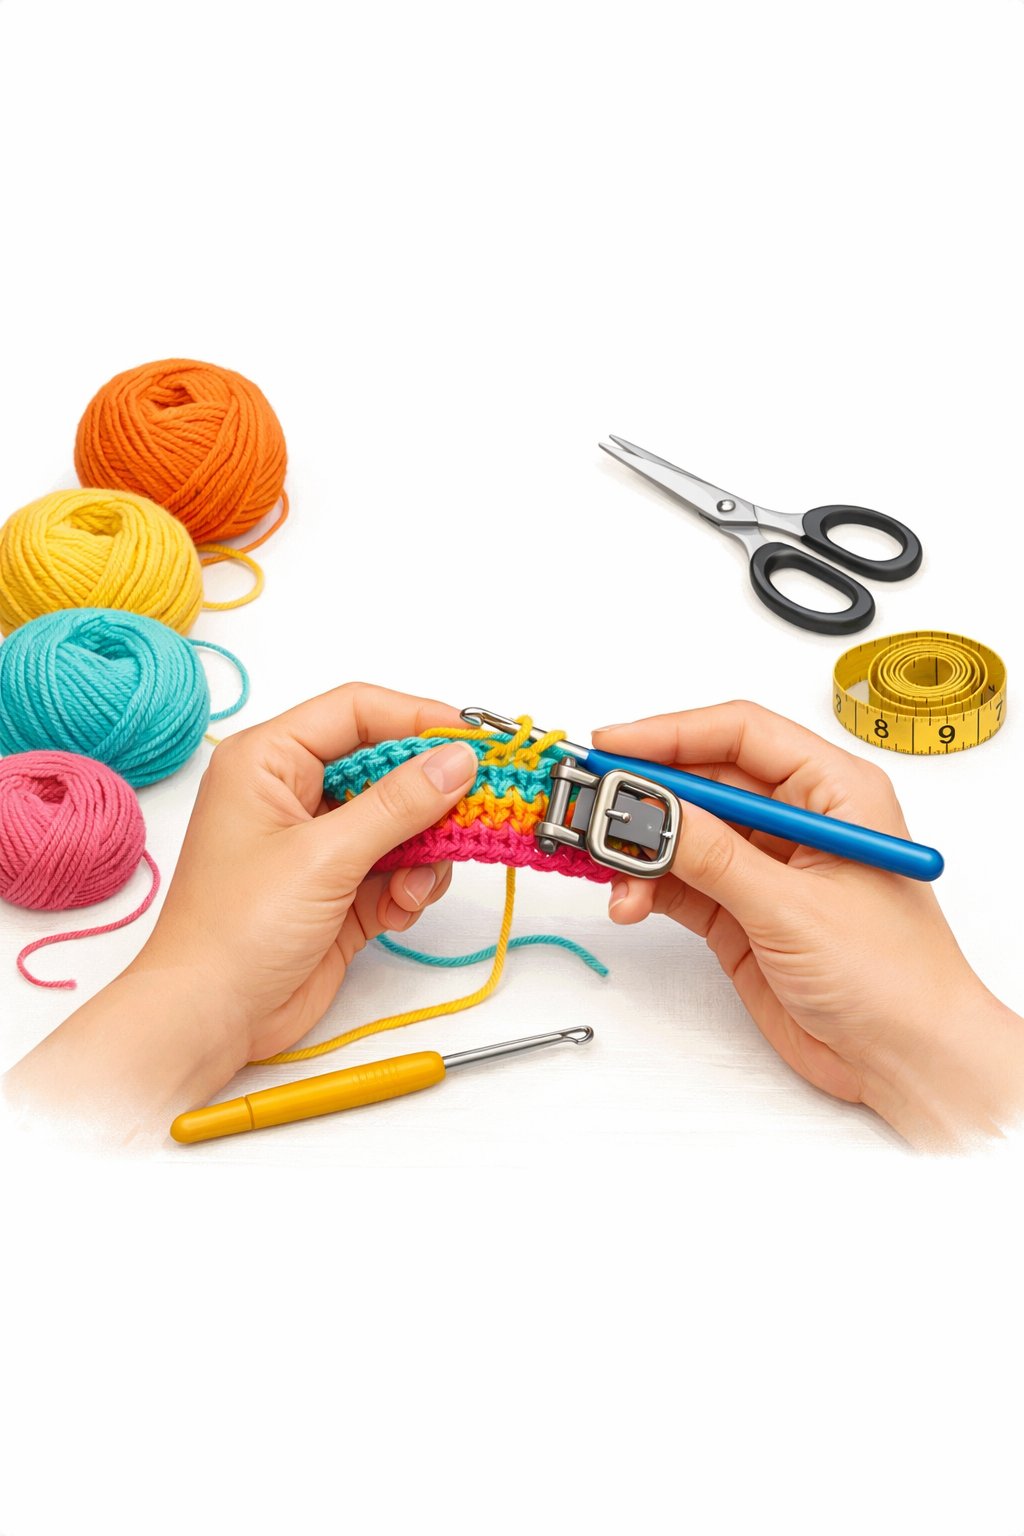
The crochet hook controls stitch size and collar firmness. A hook that is too large creates loose stitches that stretch. A hook that is too small makes the collar stiff and uncomfortable.
Most worsted weight yarn pairs well with a 5.0 mm (H/8) crochet hook. Always check the yarn label, then adjust if needed. The collar should bend easily but hold its shape.
Metal hooks glide smoothly and help maintain even tension. Plastic or bamboo hooks feel warmer in hand and reduce slipping. Consistent tension matters more than hook material, especially for collars that must fit well.
Stitch Markers and Notions
Stitch markers help track rounds, rows, and size changes. They prevent mistakes when shaping or adding hardware spaces. Locking markers work best because they stay secure during handling.
A tapestry needle finishes the collar. It weaves in ends and helps attach labels or small details. Choose one with a blunt tip to avoid splitting yarn.
Other helpful notions include measuring tape and scissors. These tools keep sizing accurate and edges clean. Simple tools make the process smoother and reduce the need to redo work.
Crochet Stitches and Techniques for Dog Collars

Strong structure and careful stitch choice help a collar stay secure and comfortable. Simple stitches build the base, while taller stitches add controlled detail without weakening the collar.
Using Single Crochet for a Sturdy Base
Single crochet creates a dense and even fabric that holds its shape. Many crafters use it as the main stitch for dog collars because it resists stretching and wear.
A collar often starts with a magic ring or a foundation chain, based on the design. The maker then works single crochet stitches in tight rows to match the dog’s neck size. This method gives clear control over length and width.
Why single crochet works well
- Keeps the collar firm
- Feels smooth against fur
- Handles daily movement
Using a smaller hook than usual can improve strength. Even tension matters more than speed, since loose stitches can weaken the collar over time.
Incorporating Treble Crochet for Decorative Details
Treble crochet adds height and open space, which suits accents rather than the full collar. Crafters often place it along edges or in short sections for style.
Because treble crochet stretches more than single crochet, it works best in limited areas. A maker may add a short treble crochet panel or repeat it every few stitches to form a pattern.
Best uses for treble crochet
| Use | Benefit |
|---|---|
| Edge trim | Adds texture without bulk |
| Accent rows | Creates visual contrast |
| Small motifs | Keeps strength intact |
The collar should return to single crochet after decorative sections. This balance keeps the collar secure while adding visual interest.
Step-by-Step Guide: How to Crochet a Dog Collar
This process covers fit, stitch choices, and assembly details that affect comfort and strength. It focuses on accurate sizing and a simple method that works for most crochet dog collar designs.
Measuring and Adapting for Fit
They start by measuring the dog’s neck with a soft tape measure. The tape should sit snug but not tight. Add 1–2 inches to allow for movement and closure space.
They then convert this length into a starting chain. Most dog collar crochet patterns use a chain that matches the neck size in inches. The stitch count matters. Many patterns work best when the chain count is a multiple of 4 or 6.
Sizing tips to follow:
- Small dogs: 8–12 inches
- Medium dogs: 12–18 inches
- Large dogs: 18–24 inches
They should test the chain around the neck before continuing. This step prevents a collar that twists, stretches, or feels stiff during wear.
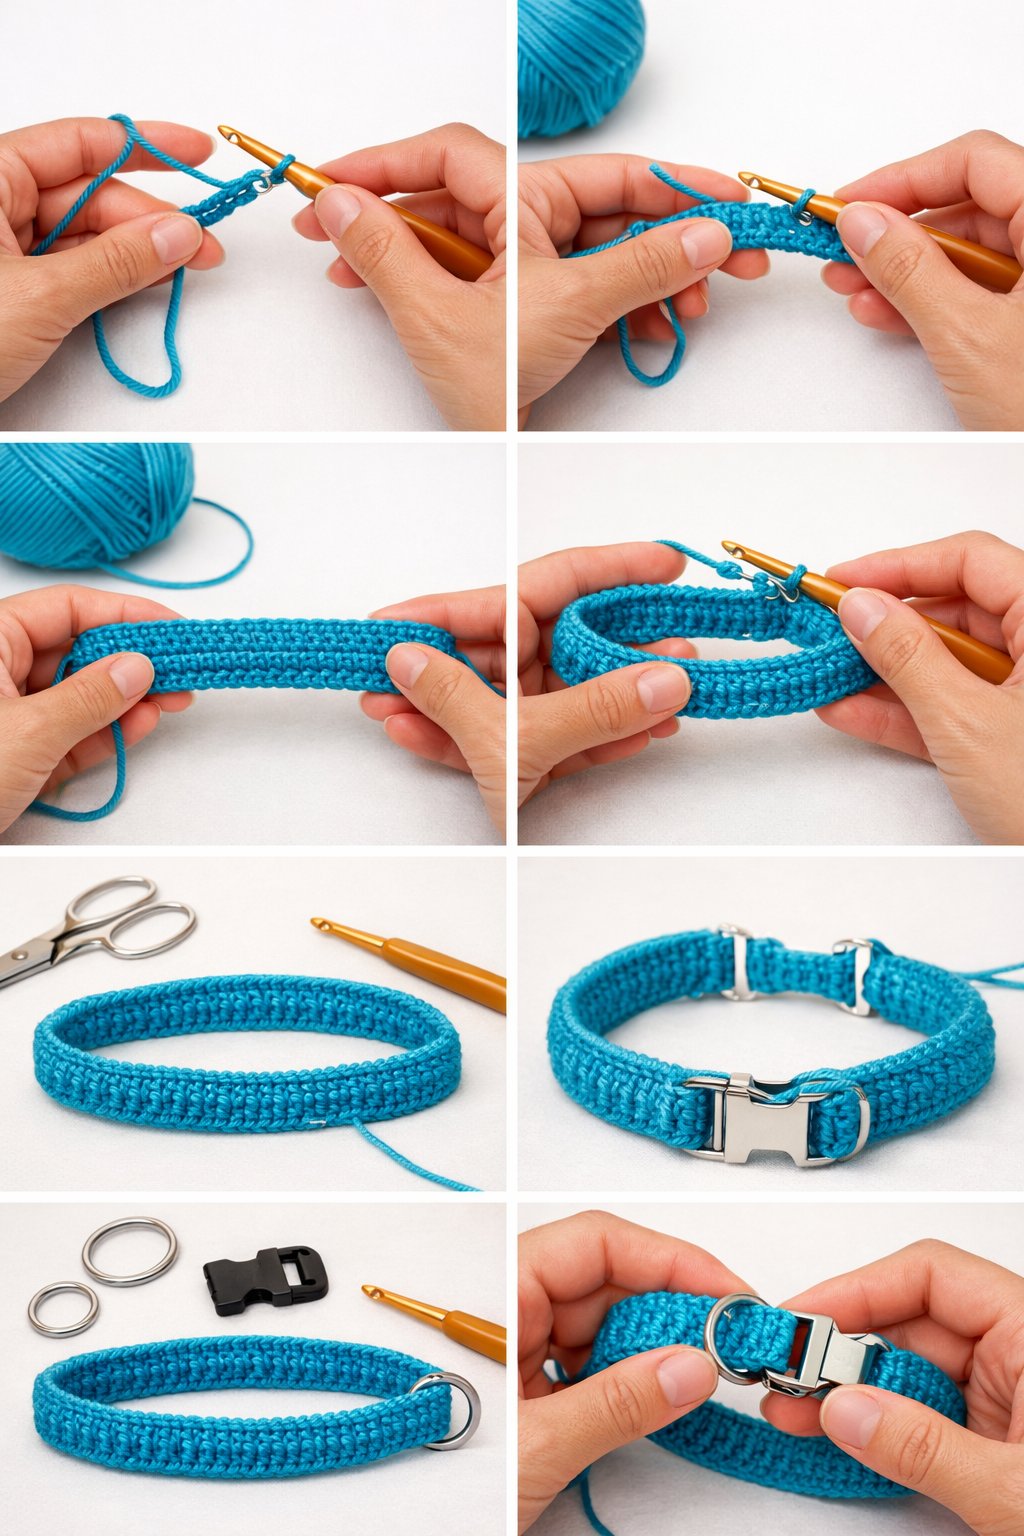
Creating a Basic Crochet Dog Collar
They begin with a slip knot and the measured chain length. Single crochet works well for strength, while half double crochet adds light texture. They keep stitches tight and even to avoid weak spots.
They turn the work at the end of each row and crochet until the collar reaches ¾ to 1 inch wide. This width supports hardware without folding. Step-by-step photos help confirm stitch placement and edge alignment.
Key assembly steps:
- Slide the buckle or D-ring onto the work
- Fold the end over the hardware
- Secure by stitching across the fold
They finish by fastening off and weaving in ends. Attaching pieces carefully ensures the dog collar crochet holds up during daily use.
Popular Crochet Dog Collar Patterns and Variations
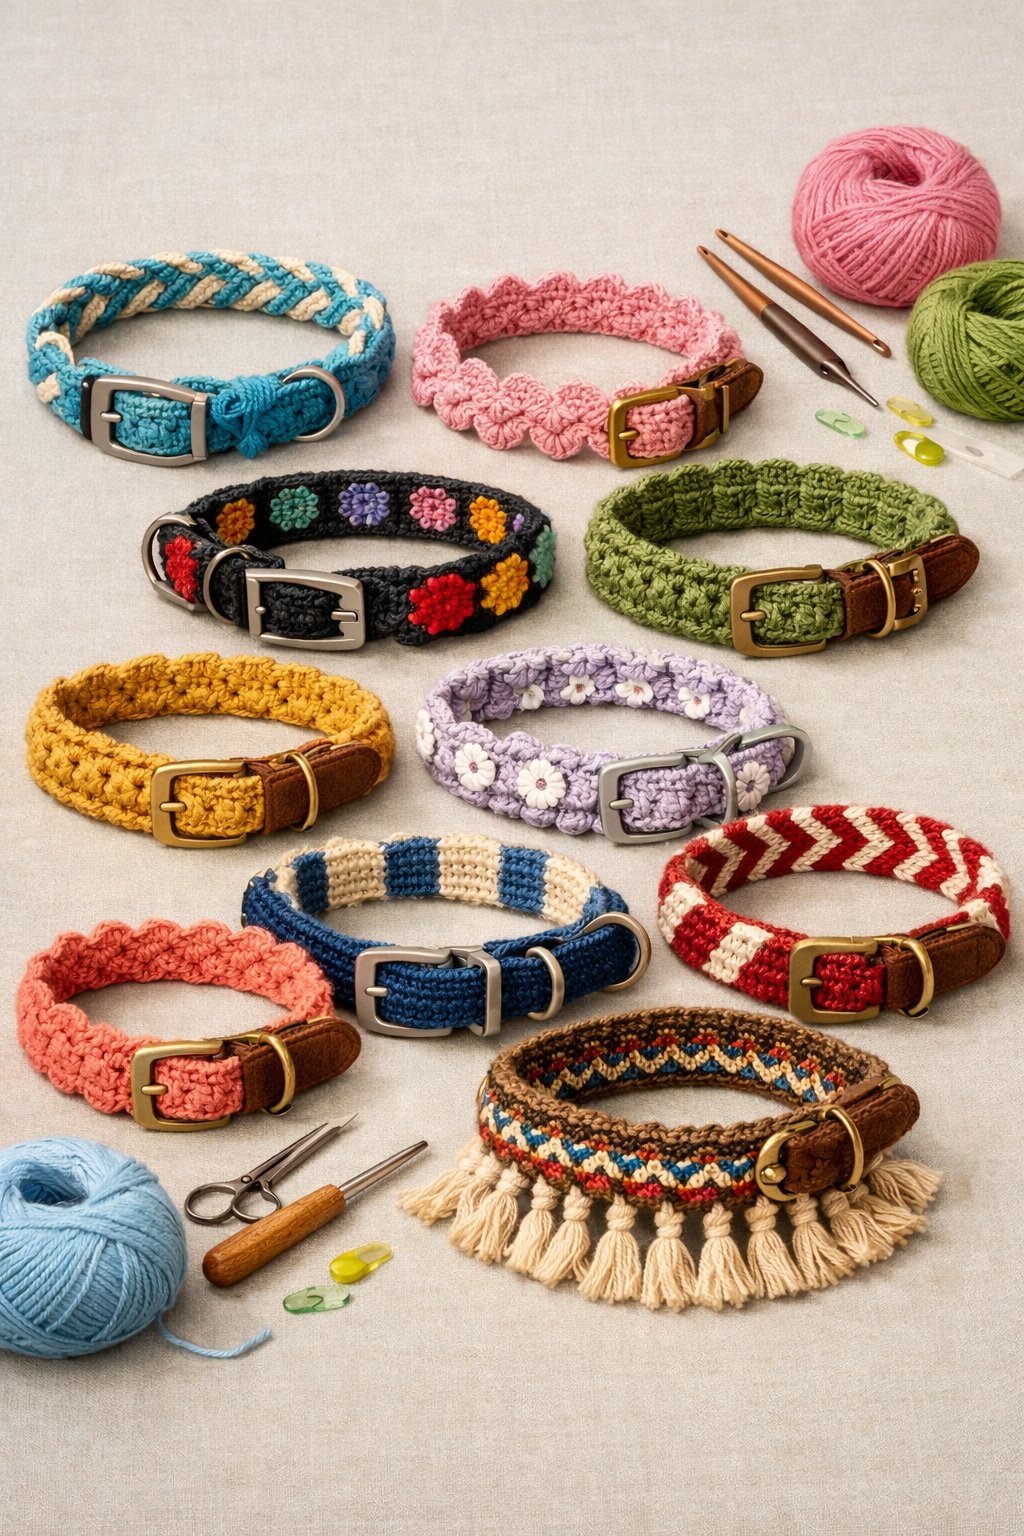
Many crochet dog collar designs focus on ease, comfort, and daily wear. Simple patterns help makers adjust size, yarn type, and closure style without complex steps. These options work well for beginners and for pets that need a lightweight collar.
### Classic and Simple Collars
Classic collars use basic stitches like single crochet or half double crochet. These stitches create a flat, firm band that holds shape and feels comfortable on a dog’s neck. Many makers choose free crochet patterns that use worsted-weight yarn for strength and easy care.
These collars often include a metal D-ring and a button or buckle closure. Some designs allow the crochet piece to slide over a store-bought collar for added safety. This method appears often in free crochet pattern collections.
Simple styles also adapt well to variations. A plain collar can support a small bow, a tag loop, or even a matching crochet dog collar and headband set. For style changes, makers may add color stripes, light texture, or a soft boho dog collar look without changing the base pattern.
| Variation | Key Feature | Best Use |
|---|---|---|
| Basic flat collar | Single crochet rows | Daily wear |
| Boho style | Fringe or textured stitch | Decorative use |
| Spiked look | Stud accents on firm yarn | Fashion only |
Finishing Touches and Personalization Ideas
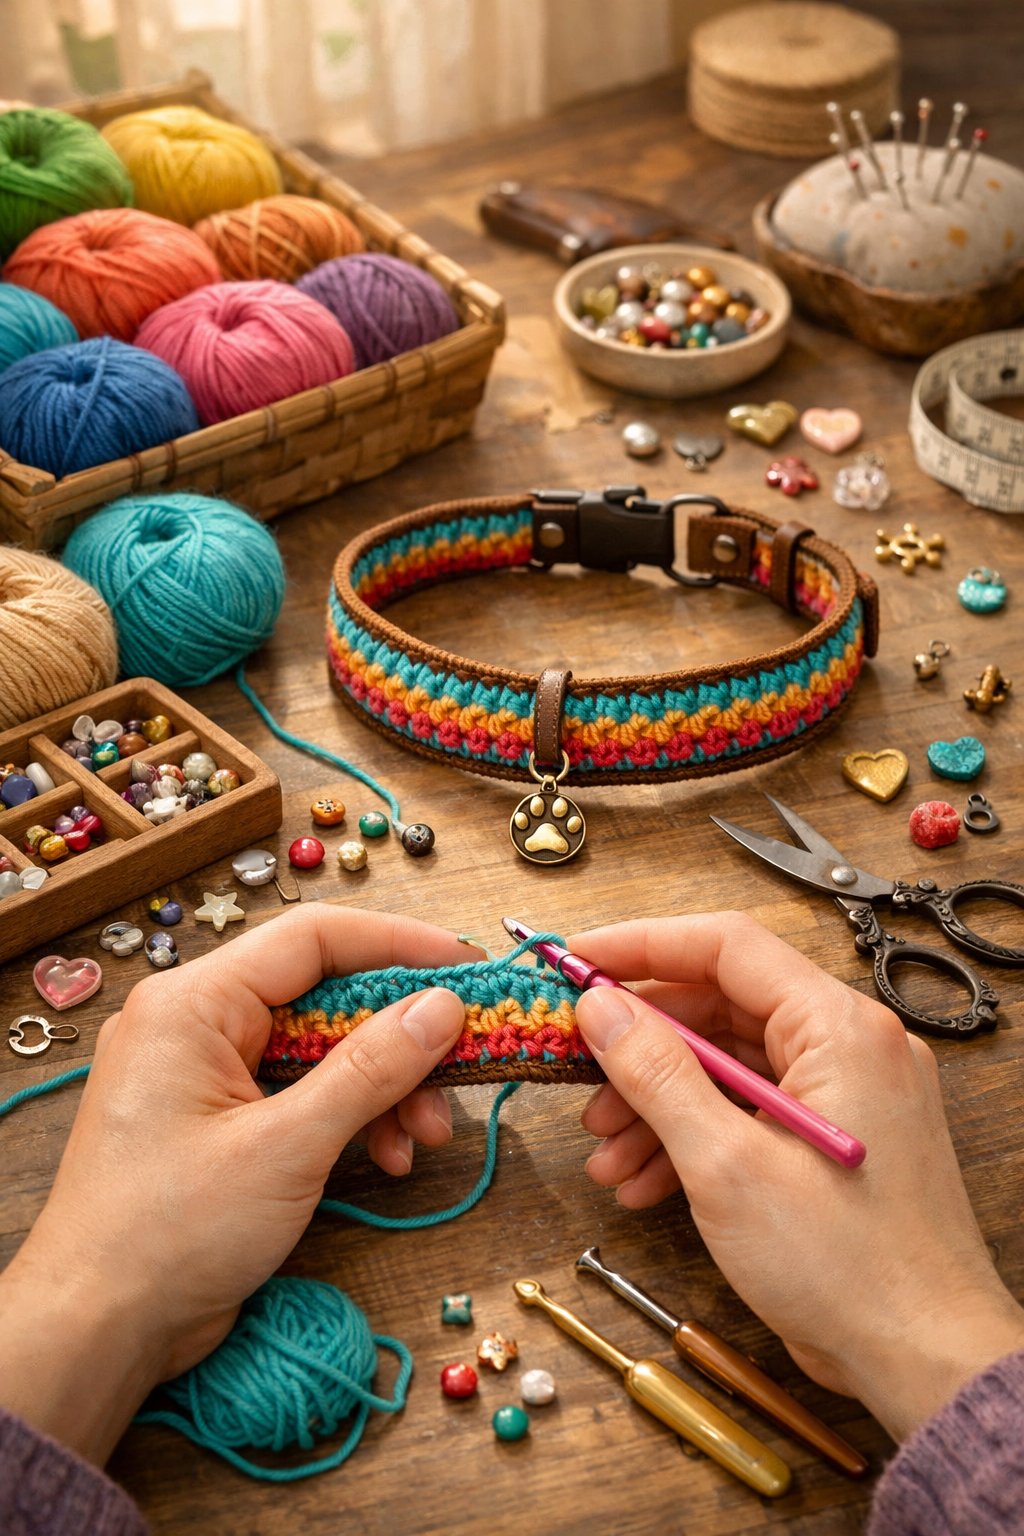
Small details change a basic crochet collar into a useful and personal item. Color choices, texture, and added pieces help improve comfort, style, and how well the collar works with other gear.
Customizing With Colors and Textures
Color choice affects both style and visibility. Bright colors help owners spot the dog fast, while darker shades hide dirt. Many makers use leftover yarn to create stripes or color blocks without adding cost.
Texture matters for comfort. Smooth stitches like single crochet sit flat and reduce rubbing. Raised stitches add interest but should stay on the outer edge of the collar.
Helpful tips for color and texture
- Use durable yarn like cotton or nylon blends
- Avoid fuzzy yarn that traps dirt
- Test the collar against the dog’s neck before finishing
Simple changes in yarn and stitch choice can improve both look and function.
Incorporating Matching Leashes
A matching leash creates a clean and planned look. Makers often use the same yarn and stitch pattern to keep both pieces consistent. This works well for short leashes used in training or casual walks.
When making a leash, strength matters more than style. Tight stitches help prevent stretching. Reinforce stress points where attaching pieces meet, such as loops and clips.
Common leash features
| Feature | Purpose |
|---|---|
| Metal clip | Secure attachment |
| Reinforced loop | Added strength |
| Flat stitch pattern | Better grip |
Matching sets look neat and help keep gear organized.
Adding Embroidery or Appliqués
Embroidery adds detail without much weight. Many people stitch the dog’s name or simple shapes using a yarn needle. Keep stitches short and tight so they stay in place.
Appliqués like small flowers or bow shapes work best when attached after the collar is finished. Sew them on firmly to avoid loose parts. Avoid hard beads or buttons that can press into the dog’s neck.
Safe design choices
- Soft yarn only
- Flat shapes
- Secure stitching
These details allow personal style while keeping comfort and safety first.