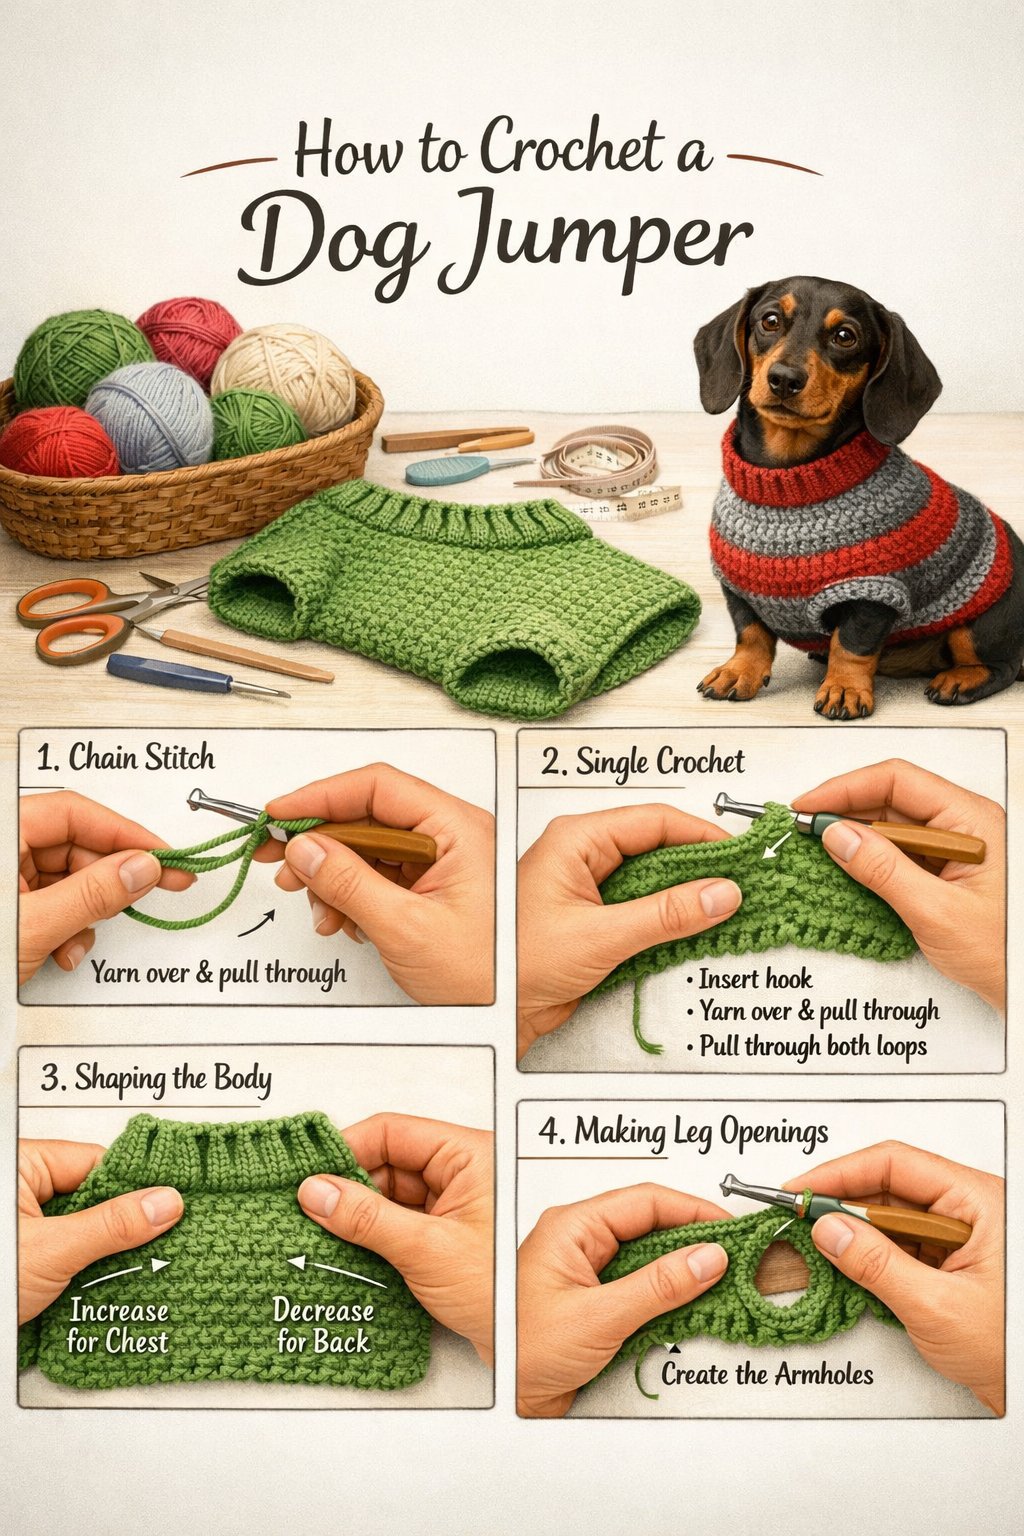
How To Crochet A Dog Jumper: Step-By-Step Guide
Crocheting a dog jumper lets you make a warm, comfortable layer that fits your dog and suits your style. You control the size, yarn, and design, so the finished jumper feels good and stays in place. This project works well for beginners and still feels rewarding if you have experience.

You crochet a dog jumper by measuring your dog, choosing simple stitches, and working the piece step by step to match your dog’s shape. With the right tools and clear steps, you can create a jumper that looks neat and allows easy movement.
This guide walks you through materials, fit, stitches, and common designs. You also learn how to avoid sizing issues and fix small mistakes, so the process stays smooth from start to finish.
How to crochet a dog jumper
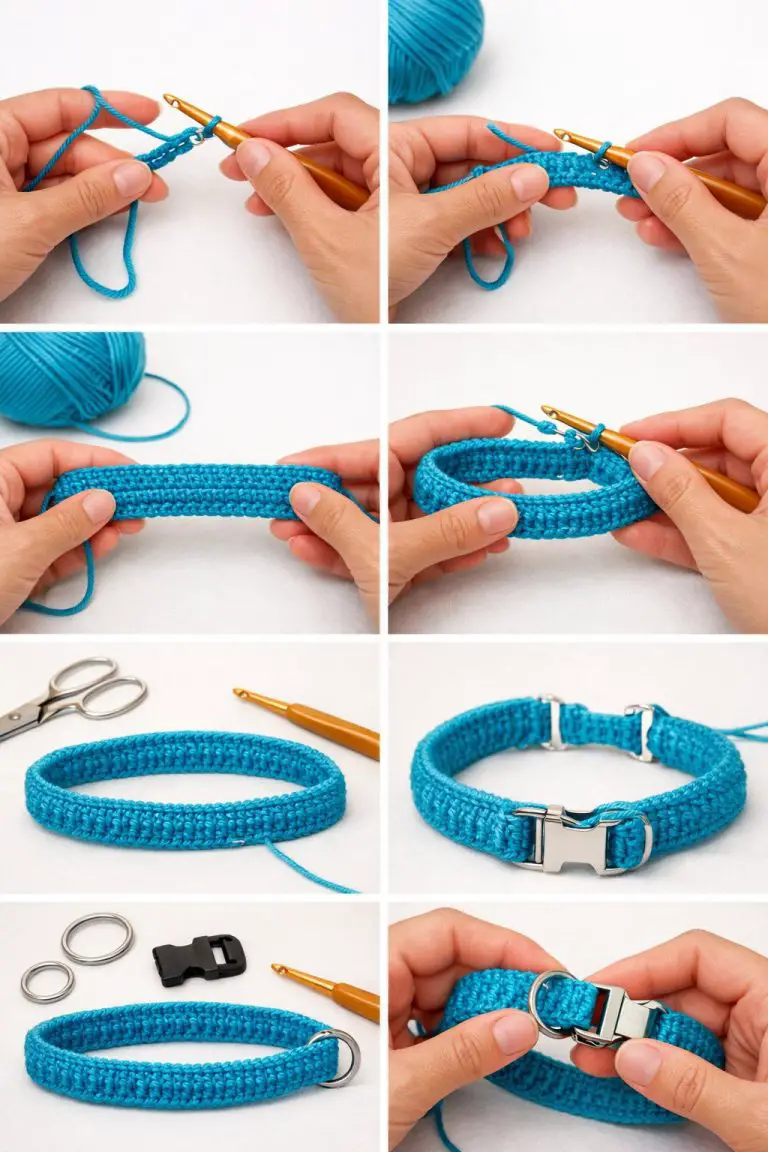
You start by choosing a simple pattern made for beginners. Many free patterns show step-by-step photos or videos and work for many dog sizes. Pick one that uses basic stitches like chain, single crochet, and double crochet.
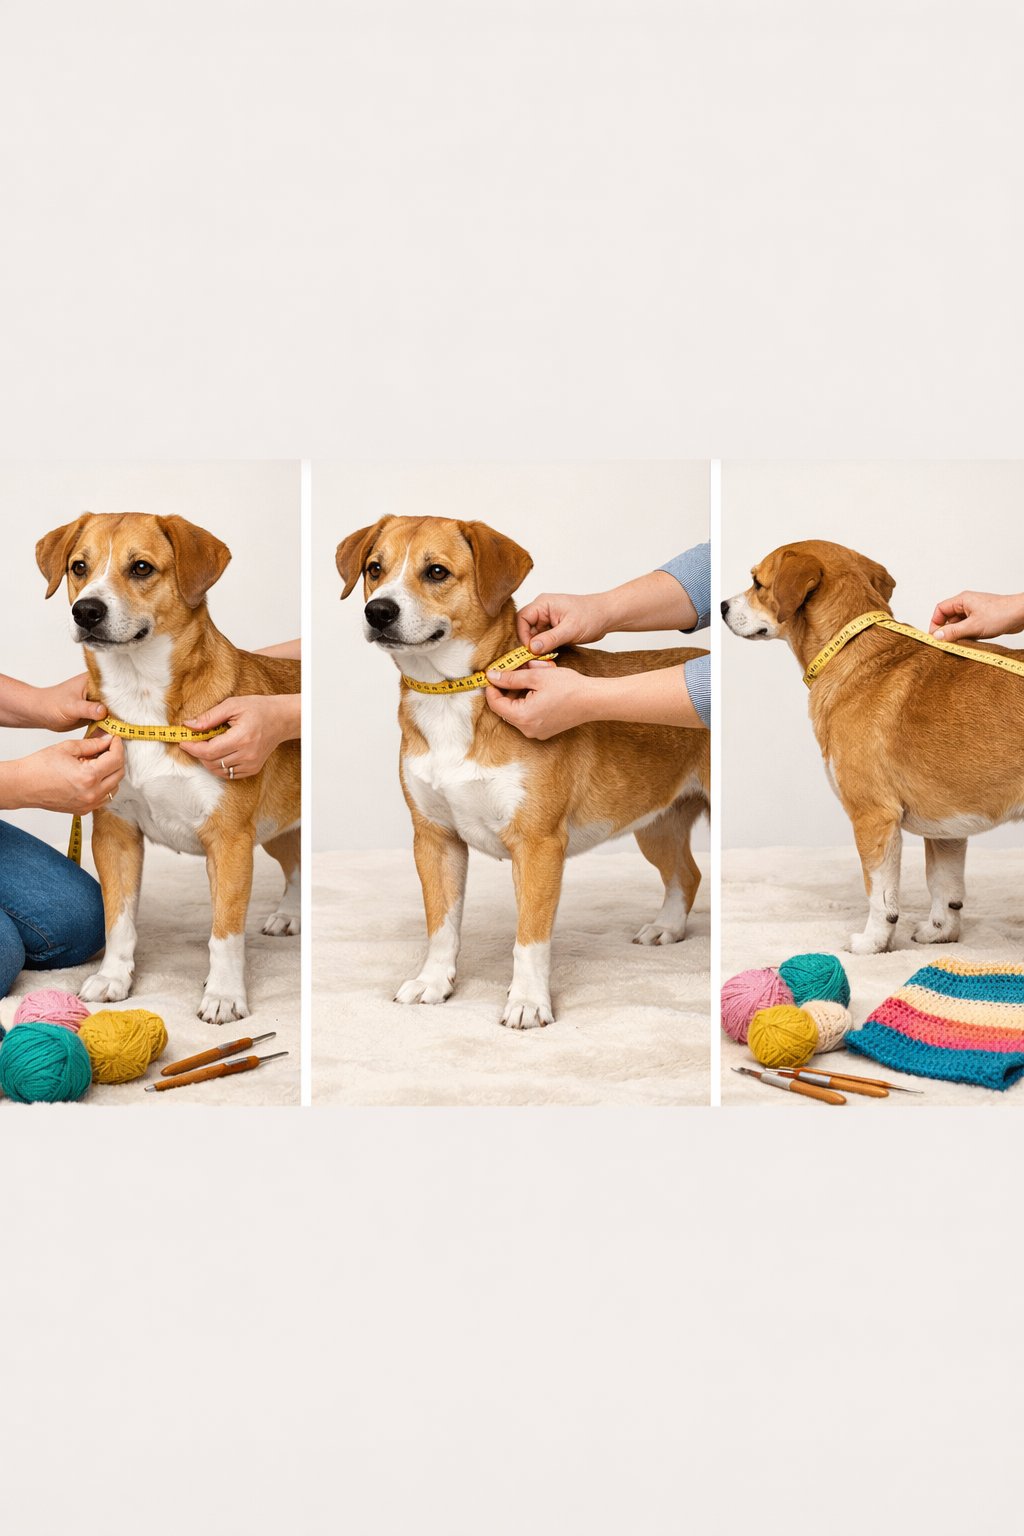
Measure your dog before you begin. You need the neck, chest, and back length. Write these numbers down and compare them to the pattern size.
Basic tools you need:
- Medium-weight yarn
- Crochet hook that matches the yarn
- Tape measure
- Scissors
- Yarn needle
You usually crochet the jumper in one piece or in a few flat panels. Most patterns begin at the neck and work down toward the body. You add stitches to shape the chest and leave openings for the front legs.
Follow the pattern row by row and count your stitches often. This helps keep the size even. If the jumper looks too tight or loose, change hook size or adjust stitch count early.
Common construction steps:
| Step | What you do |
|---|---|
| Neck | Crochet a rib or round to fit snug |
| Body | Increase stitches for the chest |
| Legs | Skip stitches to form leg holes |
| Length | Crochet until you reach the back length |
Finish by fastening off the yarn and weaving in loose ends. Try the jumper on your dog and check the fit. Adjust the edges if needed for comfort and movement.
Essential Tools and Materials for Crocheting a Dog Jumper
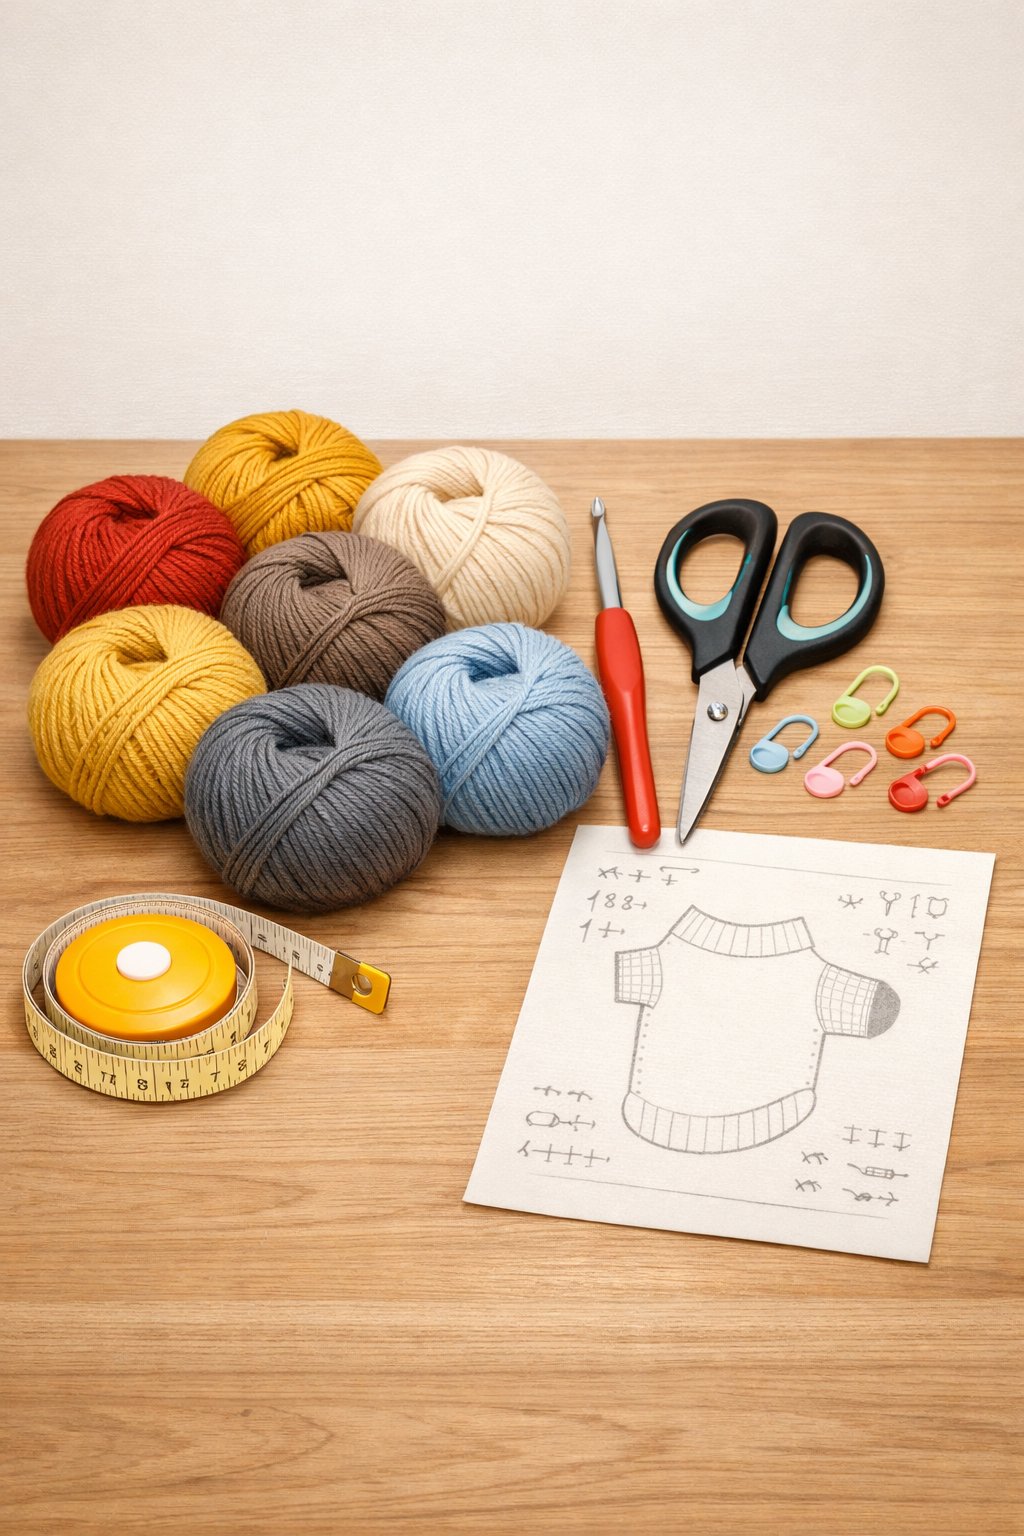
You need a small set of tools to make a dog jumper that fits well and feels good on your dog. The right yarn, hook, and measuring tools help you work faster and avoid sizing mistakes.
Choosing the Right Yarn and Hook
Pick yarn that feels soft and bends easily. Dogs move a lot, so stiff yarn can rub or limit motion. Acrylic or acrylic blends work well because they wash easily. Cotton feels cool but stretches less, so check fit often. Wool blends add warmth but may bother dogs with sensitive skin.
Match your hook to the yarn label. A hook that is too small makes tight stitches. A hook that is too large makes loose fabric.
| Yarn Type | Best Use | Notes |
|---|---|---|
| Acrylic | Daily wear | Easy care, budget friendly |
| Cotton | Mild weather | Low stretch |
| Wool blend | Cold weather | Test for itch |
Always crochet a small swatch to check size and feel.
Stitch Markers, Needles, and Measuring Tape
Stitch markers help you track rounds, increases, and armholes. Use them at the start of each round and at shape changes. This keeps the jumper even and saves time fixing errors.
A yarn needle helps you weave in ends and seam pieces. Choose a blunt tip so you do not split the yarn. Metal or plastic both work well.
A measuring tape matters more than guessing. Measure your dog’s neck, chest, and back length. Check size as you crochet, not just at the end. This avoids a jumper that slips or feels tight.
Keep these tools within reach so you stay focused while working.
Benefits of Using Free Crochet Patterns
Free crochet patterns give you tested steps without extra cost. Many patterns include size charts for small to large dogs. This helps you adjust length and width with clear numbers.
Good free patterns explain stitch counts and shaping. Some include notes for custom fits, like deeper chest space or shorter backs. This matters for breeds with unique shapes.
Look for patterns that list yarn weight, hook size, and skill level. Clear photos also help you spot mistakes early. Use free patterns as a guide, then adjust based on your dog’s real measurements.
How to Measure and Fit Your Dog for a Crochet Jumper
A good fit keeps your dog warm and comfortable. You need accurate measurements, the right size choice, and simple adjustments for your dog’s body shape.
Taking Accurate Dog Measurements
You need a soft tape measure and a calm dog. Measure while your dog stands straight on all four legs. Do not pull the tape tight.
Focus on three key areas:
- Chest (girth): Measure around the widest part, just behind the front legs.
- Neck: Measure where a collar normally sits.
- Back length: Measure from the base of the neck to the base of the tail.
Write the numbers down right away. Even small changes matter for a small dog crochet sweater. If your dog falls between sizes, use the larger measurement to avoid a tight fit.
Selecting the Appropriate Jumper Size
Use your dog’s chest size as the main guide. Most crochet patterns base sizing on this number. Neck and back length help fine-tune the fit.
Check the pattern notes for size ranges such as extra small dog sweater or small dog sweater. Compare your dog’s measurements to the chart instead of guessing.
| Measurement | What It Affects |
|---|---|
| Chest | Overall fit and comfort |
| Neck | Ease of pulling on |
| Back | Coverage and warmth |
Choose a size that allows easy movement. You should fit two fingers between the jumper and your dog’s body.
Customizing for Small and Large Dogs
Small dogs often need extra care with fit. For a small dog crochet sweater, shorten the back length first before changing the width. This keeps the chest area comfortable.
Large dogs need strong seams and enough stretch. Add extra rows around the chest instead of making the neck wider. This prevents slipping and sagging.
For both sizes, adjust leg openings early in the pattern. Mark stitch points before you crochet past them. This step helps the jumper sit flat and stay in place during walks.
Fundamental Crochet Stitches and Techniques
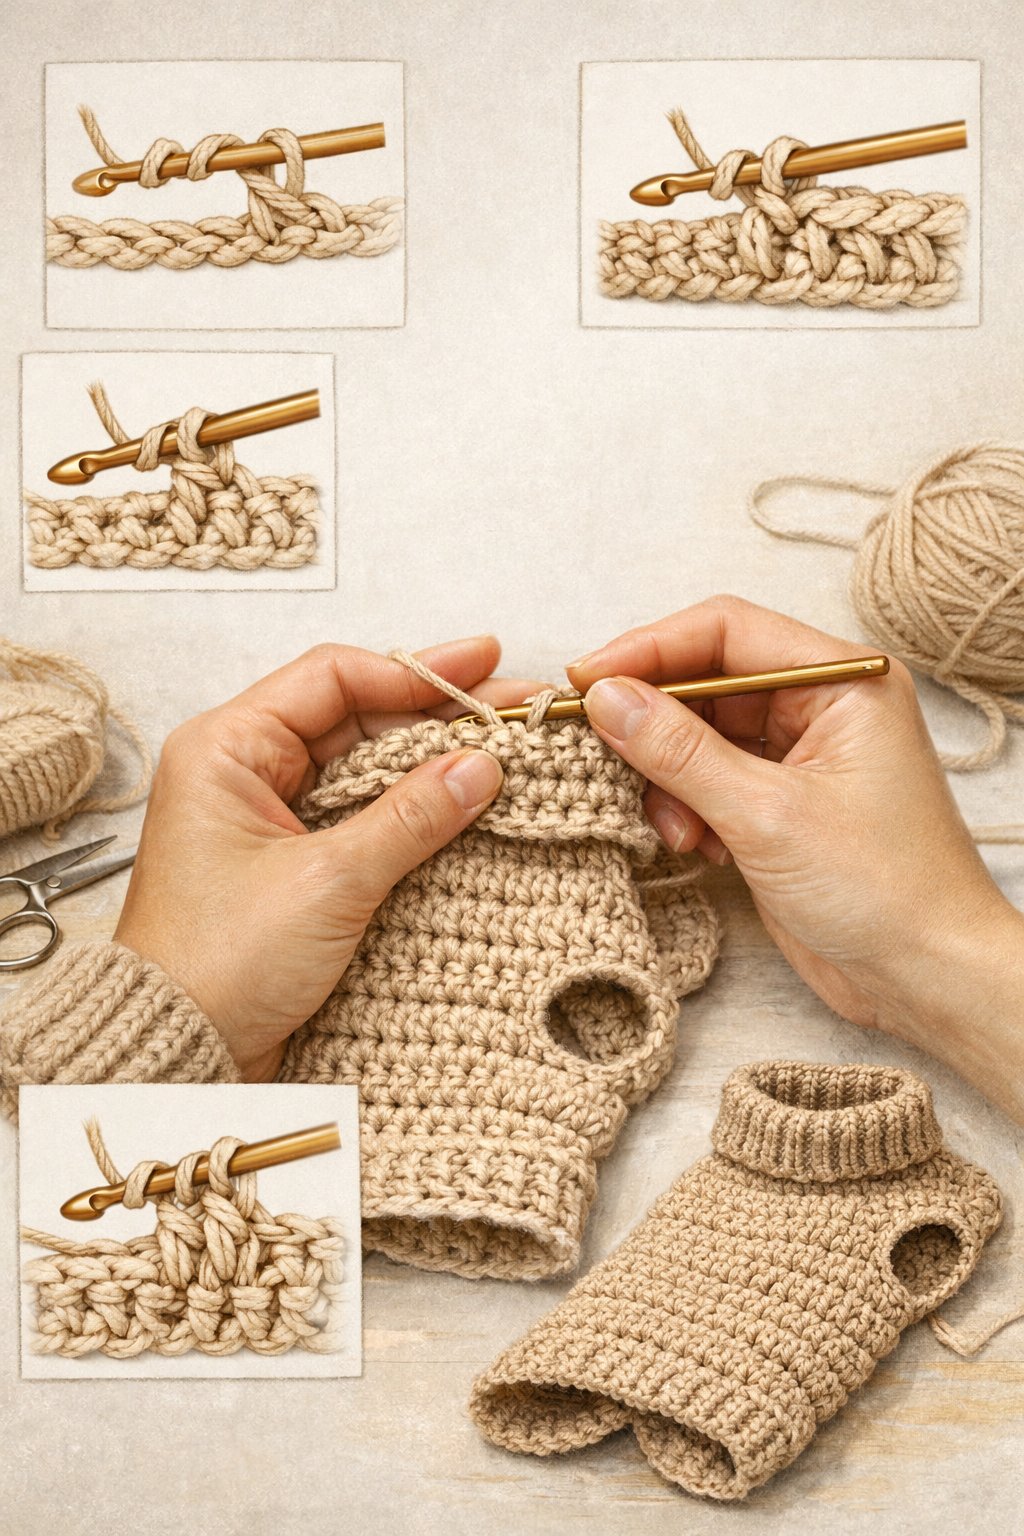
You rely on a small set of core stitches to build a dog jumper that fits well and feels comfortable. These stitches control size, stretch, and texture, which matter most when you crochet for a moving animal.
Single Crochet and Double Crochet Essentials
You use single crochet to create a dense, firm fabric that holds its shape. This stitch works well for the chest, belly, and areas that need structure. It keeps the jumper snug without adding bulk.
You use double crochet when you need height and flexibility. This stitch grows faster and adds airflow, which suits the back and sides of the jumper. It also makes size changes easier.
Key differences
| Stitch | Fabric feel | Common uses |
|---|---|---|
| Single crochet | Tight and sturdy | Chest, straps |
| Double crochet | Taller and flexible | Back panels |
You often mix both stitches in one project to balance warmth and comfort.
Slip Stitch and Chain Stitch Usage
You start almost every dog jumper with a chain stitch. The chain sets the width of the neck or body and controls the starting size. A loose chain prevents tight edges that can rub your dog’s neck.
You use the slip stitch to join rounds and clean up edges. This stitch adds no height, so it keeps seams flat and smooth. It also helps you move yarn to a new spot without changing the fabric.
Common uses
- Chain stitch: foundation rows, button loops
- Slip stitch: joining rounds, edging, shaping turns
You should keep even tension on both stitches to avoid twisting or gaps.
Ribbing, Shaping, and Texture Techniques
You create ribbing by working stitches through the back loop only. This method adds stretch, which helps the jumper slide over your dog’s head. Ribbing works best at the neck and leg openings.
You shape the jumper by adding or skipping stitches. Increases widen the chest, while decreases taper the waist. These changes keep the jumper from sagging or shifting during movement.
You add texture by changing stitch patterns or spacing. Simple repeats using single crochet and double crochet can create raised or flat areas.
Helpful techniques
- Back-loop stitches for stretch
- Even increases for chest fit
- Gradual decreases for the belly
You control comfort by shaping slowly and checking fit often.
Step-by-Step Guide to Crocheting a Dog Jumper
You build a crochet dog sweater in three main parts: the neck, the body, and the finish. Each part affects fit, comfort, and movement, so careful counting and simple checks matter.
Constructing the Collar and Neck Area
Start with the neck crochet dog coat section because it sets the size for the rest of the jumper. Measure your dog’s neck where a collar sits. Add 1–2 inches for comfort.
Work the collar in rounds or rows, based on your dog sweater crochet pattern. Many patterns use single crochet or half double crochet for stretch and control. Front and back post stitches help the collar stand up and flex.
Keep the collar snug but not tight. You should fit two fingers under it.
Quick collar guide
| Item | Tip |
|---|---|
| Stitch count | Must divide evenly for the body |
| Height | 2–4 inches for most dogs |
| Check | Slip it over your dog’s head |
Join the last row cleanly so the neck stays smooth.
Creating the Body and Leg Openings
After the collar, you shape the body of the crochet dog sweater. Increase stitches evenly on the first body round. This allows the jumper to sit flat across the chest.
Work until the fabric reaches the leg area. At that point, skip a set number of stitches on each side to form leg openings. Chain over the gap, then continue the round.
Try the sweater on your dog often. The body should cover the ribs without pulling.
Key body tips
- Place leg holes behind the front legs, not under them
- Keep both openings the same size
- Stop the body before the hips to allow easy walking
This step defines how to crochet a dog sweater that fits well.
Finishing Touches and Edging
Finish the jumper with simple edging to keep it neat. Single crochet works well around leg holes and the bottom edge. It adds strength without bulk.
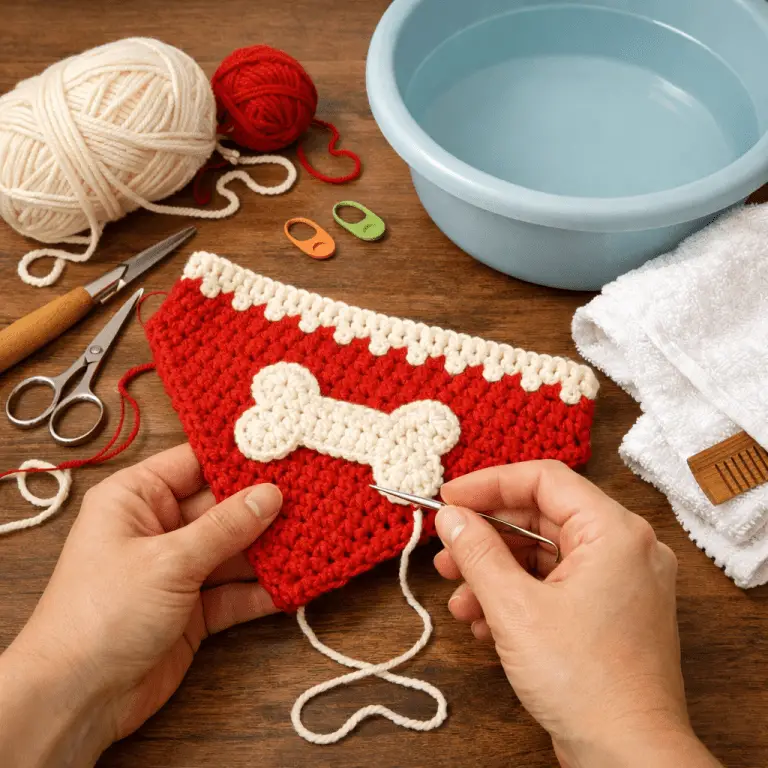
Weave in all yarn ends on the inside. Trim close, but do not cut the fabric. Check seams and joins for loose loops.
Optional details include a short ribbed hem or a small leash opening. Keep extras minimal so the jumper stays comfortable.
Lay the dog jumper flat and measure it against your notes. Small fixes now improve wear and wash results later.
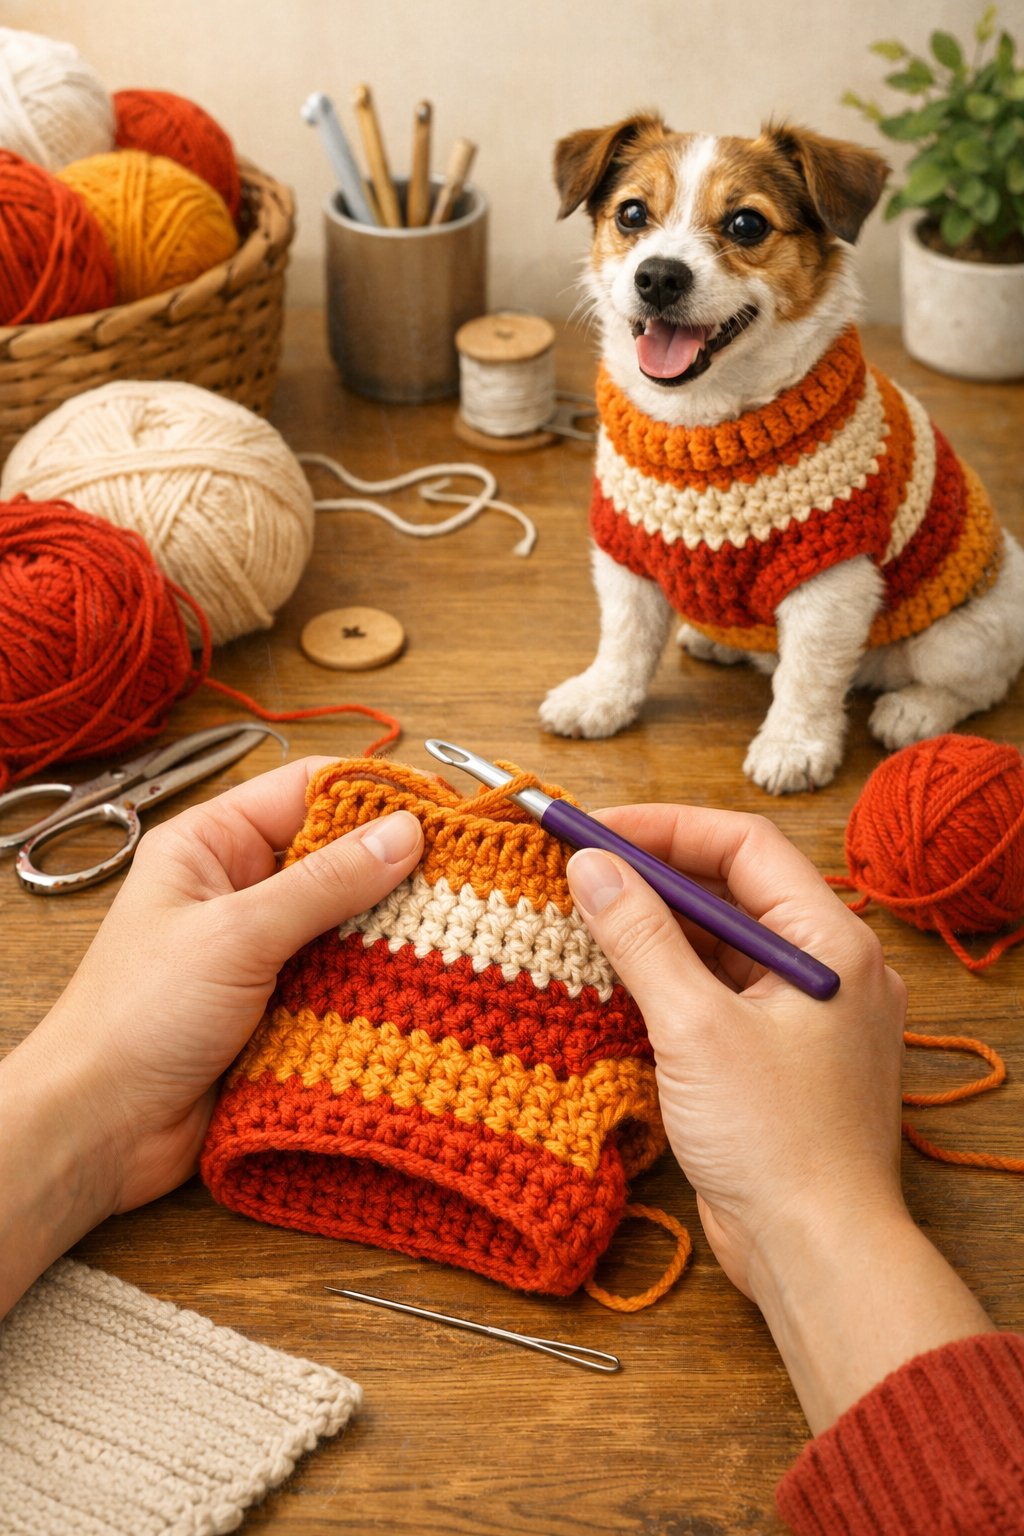
Popular Dog Jumper Designs and Pattern Variations

Dog jumper designs often focus on texture and visual detail. Many crochet dog sweater patterns use raised stitches or color changes to add warmth and style without changing the basic fit.
Textured and Cabled Dog Sweaters
Textured crochet dog coats use stitches that stand out from the fabric. You create texture with post stitches, front loop work, or simple raised rows. These patterns add warmth and help the jumper hold its shape.
A cabled dog sweater uses crossing post stitches to form rope-like lines. Cables work best on the back panel, where they stay flat and visible. Keep the sides plain to avoid stiffness around the legs.
Common textured options include:
- Ribbed panels for stretch and comfort
- Seed or moss stitch for even texture
- Light cable sections for a well dressed dog coat
Many cosy crochet dog sweater patterns mix one textured panel with smooth sections to balance comfort and style.
Bobbles, Houndstooth, and Gingham Styles
Decorative patterns rely on shape or color changes. A bobbles crochet dog sweater uses small raised clusters to create dots or playful shapes. Bobbles add weight, so place them across the back or chest, not near the legs.
Colorwork designs focus on contrast. A houndstooth dog sweater uses two colors and simple stitch changes to form a sharp pattern. It works best with smooth yarn and even tension.
A gingham-style crochet dog sweater uses three colors in blocks. You change colors often, so keep floats short and neat. Fun themes, like a tiny berry dog sweater or bumble bee dog sweater, often build on these same colorwork basics.
Tips for Success and Common Issues

Small details affect fit, comfort, and wear. Focus on stitch control, sizing, and basic care to help your dog jumper last and feel good.
Troubleshooting Crochet Mistakes
If the jumper fits wrong, check gauge first. A tight gauge makes stiff fabric. A loose gauge causes sagging. Match the hook size listed in your crochet dog sweater free pattern, or adjust until your swatch matches.
Common problems and fixes:
| Issue | Likely Cause | Fix |
|---|---|---|
| Neck too tight | Too few stitches | Add stitches or use a stretchy rib |
| Body twists | Missed increases | Count stitches each round |
| Gaps near legs | Loose joins | Pull joins snug and check tension |
Curling edges often happen with single crochet. Add a border or switch to half double crochet. If the jumper looks uneven, you may have skipped stitches. Use a marker at the start of each round.
When using free crochet dog sweater patterns, read all size notes. Many easy crochet dog sweater designs rely on chest width more than length.
Caring for Your Finished Dog Jumper
Yarn choice affects care. Acrylic handles frequent washing. Wool needs gentle care. Cotton may stretch when wet.
Follow these care steps:
- Hand wash in cool water with mild soap
- Gently squeeze; do not wring
- Lay flat to dry and reshape
Check seams after the first wash. Reinforce loose ends right away. Trim pills with scissors to keep a clean look.
Store the jumper flat to avoid stretching. If your dog grows, rework the belly strap or add length. This approach works well with a free crochet dog sweater made in sections.