How to Sew a Free Dog Bandana Pattern in 2 Styles: Step-by-Step Guide
You can make two stylish dog bandanas with one free pattern: a tie-on version that ties around the neck and an over-the-collar version that slips over your dog’s collar. Both styles are quick to sew, use simple materials like cotton fabric and basic sewing tools, and come in sizes from XS to XL so you can fit any dog.
This post shows what supplies you need, explains the key differences between the two styles, and gives step-by-step sewing instructions for the tie-on and over-the-collar options. You’ll also find easy customization ideas, finishing tips, and troubleshooting notes to help you finish a neat, safe bandana the first time.
Materials and Supplies You Will Need

Gather a few reliable fabrics, a basic sewing kit, and a sewing machine (or hand-sewing tools) to make both the tie-on and over-the-collar bandana styles. Pay attention to fabric weight, cutting tools, and simple notions so your bandana fits well and lasts through washings.
Choosing the Right Fabric
Pick a woven cotton like quilting cotton for its stable weave and easy pressing. Quilting cotton holds shape when you fold hems and turn corners, so the bandana looks crisp and lays flat on your dog’s neck. Avoid very stretchy knits; they can warp and fray at the edges.
If you want a softer drape, choose a lightweight cotton lawn or a brushed cotton, but still stay away from slippery synthetics. For outdoor use or increased durability, consider a cotton blend or adding a lining of plain cotton. Check fabric care labels so you can wash the bandana without shrinking it.
Essential Sewing Tools
Bring these basics to your work surface: sewing machine, matching thread, fabric scissors, pins or clips, measuring tape, and an iron. Your sewing machine speeds up seams and topstitching, but you can hand-sew the project if you prefer.
You’ll also need a ruler or clear quilting ruler and a fabric marker or tailor’s chalk to transfer pattern lines. For the tie-on version, small clips or safety pins help hold straps when turning. Keep a hand-sewing needle for the final invisible stitch and a seam ripper for quick fixes.
Using Fabric Scraps and Fat Quarters
Fat quarters and fabric scraps work very well for bandanas and reduce waste. A single fat quarter (about 18″ x 22″) is usually enough for small to medium sizes, and smaller scraps can make reversible or patchwork bandanas.
When using scraps, choose pieces that are at least 10–12 inches across for small sizes or pair scraps for the ties. Press seams flat before assembling so the fabric layers lie smoothly. Visit your local fabric store for quilting cotton remnants if you need matching prints or extra yardage.
Bandana Styles Overview and Key Differences

Choose the style that fits your dog’s collar, size, and how often you want to swap looks. Each style uses a simple dog bandana pattern but changes how you finish the edges and attach it to your dog.
Tie-On Dog Bandana
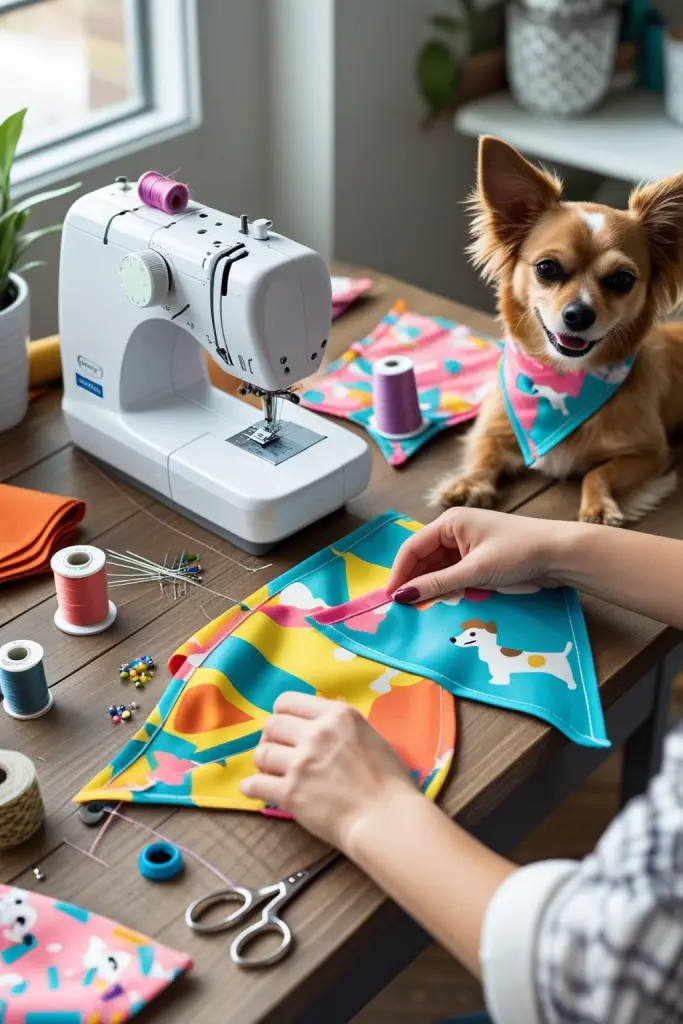
A tie-on dog bandana uses two straps you sew to the bandana body and tie behind the neck. Cut the bandana body and two strap pieces from your dog bandana template. Sew each strap with right sides together, turn, press, and close the opening. Insert the closed ends of the straps into the top corners of the bandana body before sewing the body together.
This style works well for dogs without collars or for outfits you want to remove quickly. It suits all sizes—use the pattern’s XS–XL pieces to match your dog. You can add names or patches before finishing the seams. Ties let you adjust fit, but check knots for comfort and safety.
Over-the-Collar Dog Bandana
An over-the-collar dog bandana slides onto the collar so it stays in place while your dog moves. Use the single-piece dog bandana template for this style. Hem the collar channel by folding the top edge twice (about 1/4″ each fold), sew a straight stitch, then slide the bandana onto the collar.
This option is faster to make and safer on walks because it won’t slip off easily. It’s best for dogs that wear collars most of the time. Make sure the collar channel is wide enough for your dog’s collar thickness. Add a small bartack at the edges if you want extra strength.
Reversible Dog Bandana Features
A reversible dog bandana gives you two looks with one piece by sewing two fabric layers together. Cut two identical bandana body pieces from the dog bandana pattern. Place right sides together and sew around, leaving a turning gap. Turn, press, and topstitch close to the edge to secure both fabrics.
Reversible designs need neat seams and often a slightly larger seam allowance for a clean finish. You can combine prints or use a water-resistant layer for outdoor use. For over-the-collar reversible versions, press and sew the collar channel on both layers before turning. For tie-on reversible bandanas, insert straps between layers before stitching the body closed.
How to Sew a Tie-On Dog Bandana

You will make a bandana body plus two ties, cut from a printable pattern, then stitch, turn, and hand-finish the opening. Pay attention to seam allowance and tie placement so the bandana fits and the ties stay secure.
Creating or Downloading a Printable Pattern
Choose a free sewing pattern that includes a tie-up variation or draw your own template on paper. For a simple tie-on bandana, draft a triangle body about 12″ wide for small dogs up to 20″ for large dogs, and two long straps 3″ wide by 16–24″ long depending on collar size. Mark seam allowance on the pattern: 1/4″ is common for cotton woven fabrics.
Print at 100% scale and check measurements with a ruler. Cut the paper pieces and label them (A = body, B = ties). If you use a downloadable dog bandana template, confirm it lists sizes XS–XL or shows measurements so you can match your dog’s neck.
Keep the pattern on cardstock or tape pieces together for reuse. This prevents distortion when you trace onto fabric.
Cutting and Preparing Fabric Pieces
Lay your chosen cotton fabric flat and place the pattern pieces on the right side. Use fabric weights or pins to hold them steady. Cut two mirror body pieces for a reversible look, or one body and a lining if you prefer a single layer.
Add 1/4″ seam allowance unless your pattern states otherwise. Transfer any notches or tie-placement marks with tailor’s chalk or washable pen. For ties, cut two strips on the grain for strength. If using scraps, make sure pieces are large enough to include seam allowance.
Press cut pieces flat. Finish raw edges with a zigzag stitch or serger if your fabric frays easily. This step helps keep seams neat when you turn the bandana inside out.
Assembling and Attaching the Ties
Place the two body pieces right sides together and pin along the edges, leaving a 2″–3″ opening near the top edge for turning. Position the raw ends of the folded ties so the closed ends sit at the center top seam and the open ends align with the side edges. Pin ties in place with the folded edge toward the bandana center.
Sew around the triangle at a 1/4″ seam allowance, stitching over the tie ends to secure them. Backstitch at tie attachment points to lock the thread. Clip corners and trim seam curves carefully without cutting into stitching.
Turn the bandana right-side out through the opening and gently push out the point with a blunt tool. Pull ties out so they extend neatly from the side edges before pressing.
Finishing Techniques and Seam Allowance
Press the entire bandana flat, folding seam allowance of the turning opening inward by 1/4″ so edges meet cleanly. Use a slip stitch (invisible stitch) or topstitch close to the edge to close the opening and stabilize the bandana.
Topstitch 1/8″ from the edge around the whole bandana to flatten seams and secure tie ends. This adds strength and a finished look. If you used 1/4″ seam allowance, keep topstitching consistent to avoid changing the size.
Optional finishes: add interfacing to the tie strips for stiffness, use double-fold hems on tie ends for durability, or add a small line of bartack stitching where each tie meets the bandana for heavy pull resistance. Check final fit on your dog and trim tie length if needed for safety.
How to Make an Over-the-Collar Dog Bandana

This method makes a triangle bandana with a built-in casing that the collar slides through. You’ll cut to size for your dog, hem the collar slot, sew the triangle, and turn the piece so the right side shows.
Preparing the Over-the-Collar Pattern
Choose the correct pattern size for your dog: XS, S, M, L, or XL based on collar width and neck circumference. Print or trace the triangle piece only (no ties). Add 1/4″ seam allowance along the two side edges and a 1/2″ allowance at the top edge where the collar will slip through.
Cut two fabric triangles (right and wrong sides) from woven cotton or lightweight canvas. If you want reversible bandanas, cut two contrasting triangles. Interface the top 1–2 inches of each wrong-side triangle if your fabric is thin; this keeps the collar slot from sagging. Mark the top 1/2″ fold lines with chalk so you know where to press the casing.
Materials checklist:
- Pattern triangle in your dog’s size
- Fabric, thread, iron, pins or clips
- Optional interfacing sized to the collar casing
Sewing the Casing for the Dog Collar
Press the top edge twice to form a neat casing that matches your collar thickness. Fold the top edge 1/4″ toward the wrong side, press, then fold again to create a finished channel. If your collar is wide, increase folds so the final opening fits the collar snugly.
Topstitch close to the folded edge to secure the casing. Use a longer stitch length for neatness on lightweight fabric. Backstitch at the start and end to lock stitches. If you used interfacing, stitch just below it to keep the casing stable under wear.
Check the opening by sliding the collar through before you sew the triangle sides. The collar should slide freely but not be so loose the bandana droops when worn.
Assembling and Turning the Bandana
Place right sides of the two triangles together and align edges. Pin or clip along the two side edges only; leave the top casing edge open. Sew an even 1/4″ seam from one side point to the other, pivoting at the bottom tip for a clean point.
Trim seam allowances at corners and clip the bottom triangle point carefully without cutting the stitch line. Turn the bandana right side out through the open casing top. Use a blunt tool or chopstick to push out the triangle point fully for a sharp corner.
Press the entire bandana flat, paying special attention to the casing seam. If you want a cleaner finish, topstitch around the triangle 1/8″ from the edge, sewing close to the seam for durability.
Inserting the Collar and Fitting
Slide your dog’s collar through the casing. If the collar has buckles or D-rings, put the bandana on the collar before you fasten it on your dog. Position the bandana so the triangle point sits centered under the dog’s chin or at the chest, depending on the look you want.
Check fit: the bandana should sit comfortably without tightness. You should be able to fit two fingers between the collar and your dog’s neck. For puppies, use the smallest pattern and a narrow collar to avoid bulk.
For safety, avoid thin loose fabric near the collar hardware. If you walk at night, sew or iron on reflective trim to the triangle so the bandana increases visibility.
Customization and Finishing Touches

This section shows how to size the bandana, add names or seasonal looks, pick trims and closures, and keep the bandana safe and washable. Use specific measurements, fabric tips, and simple decoration methods to get a neat result for any dog.
Sizing for Different Dogs and Puppies
Measure your dog’s neck where the collar sits. Add 2–4 inches (5–10 cm) for comfort and tying. For over-the-collar styles, measure the collar width and add at least 1 inch (2.5 cm) to the collar slot so the bandana slides easily.
Use these quick guides:
- XS (toy/puppy): collar 6–10 in, bandana base 6–7 in wide.
- S (small dogs): collar 10–14 in, base 8–9 in.
- M (medium dogs): collar 14–18 in, base 10–12 in.
- L (large dogs/Newfoundland): collar 18–24 in, base 13–16 in. Adjust the triangle height so the point hangs about 2–4 inches below the collar on small pups, and 4–7 inches on big dogs like a Newfoundland.
For tie-up bandanas, make straps at least 12–18 inches long so you can tie a knot and trim excess. If you sew reversible styles, cut both layers the same size and add a ¼” seam allowance.
Personalization and Seasonal Ideas
Add a name or phrase with iron-on letters, embroidery, or fabric paint. Center names on the bandana’s straight top edge for best visibility. Use fusible web for appliqué letters to keep edges tidy.
Seasonal themes:
- Spring: pastel cottons, small floral prints.
- Summer: breathable cotton, nautical stripes.
- Fall: plaid flannel, muted tones.
- Winter/holidays: thicker cotton, small bells or felt shapes sewn on securely.
Place any iron-on or embroidery before final assembly so seams don’t distort the design. For puppies, keep patches low-profile to avoid chewing or irritation.
Using Decorative Elements
Choose flat trims to avoid bulk around the collar. Options that sew on easily:
- Bias tape or piping along the bandana edges.
- Flat ribbon loops for attaching ID tags.
- Small, securely stitched buttons or fabric bows (not glued).
If you add reflective tape, stitch both edges so it won’t peel. For reversible bandanas, use contrast fabric or topstitch in a bright thread to create a clean edge that shows on both sides.
Avoid heavy metal hardware or large dangling items. Test any decoration by tugging gently and by observing your dog for a few minutes to ensure comfort.
Care and Safety Tips
Use 100% cotton or cotton blends for easy washing. Prewash fabric to prevent shrinking and color bleed. Wash on a gentle cycle and air dry or tumble dry low.
Check seams and attachments regularly. Re-stitch any loose straps and replace worn ties. If you add paint or adhesive, let it cure fully per product instructions before letting your dog wear the bandana.
Keep small dogs and puppies safe by removing bandanas during unsupervised play or crate time. For active dogs, prefer the over-the-collar design so the bandana detaches if it snags.
Tips for Success and Troubleshooting

Practice cutting accurately, check seam allowances, and pick the right fabric for your dog’s size and comfort. Small prep steps — pressing seams, pinning straps, and measuring the collar opening — save time and reduce mistakes.
Common Mistakes and How to Avoid Them
A frequent error is cutting the pattern pieces without adding seam allowance. Always check your free dog bandana pattern for included allowances; if none are listed, add 1/4″ (6 mm) around each edge before cutting.
Another issue is uneven straps or mismatched corners. Pin or clip the straps in place, then baste by hand before machine sewing. This keeps ties centered when you fold the bandana body.
Using a slippery or heavy fabric can make corners bulky. Use lightweight woven cotton for a clean over-the-collar finish. Trim seam corners (not through stitches) and clip curves to reduce bulk before turning.
Finally, forgetting to leave an opening to turn the piece right side out will force you to unstitch. Mark the turning gap on your pattern and keep it at least 1.5–2″ wide for easy hand-sewing closed.
Time-Saving Sewing Tips
Cut multiple bandanas at once using stacked fabric and the same pattern piece. Layer up to 4–6 cotton layers and cut with a sharp rotary cutter to speed layout and ensure identical pieces.
Use clips instead of pins when sewing ties. Clips hold thick intersections better and reduce shifting. Baste straps with a long stitch, then sew final seams at a regular stitch length; this prevents redoing misaligned pieces.
Press seams flat after each major step. A fast iron at the end of each bandana saves time when you topstitch and gives a neater look. For reversible or tie-up styles, chain-piece matching parts to keep workflow continuous.
Keep common tools in a small kit: rotary cutter, ruler, fabric scissors, clips, coordinating thread, and a marking pen. Having these ready near your machine cuts setup time and keeps projects moving.
Recommended Resources for Free Patterns
Search reputable sewing blogs and craft sites for a free dog bandana pattern that includes XS–XL sizing charts. Look for PDF templates labeled “over-the-collar” or “tie-up” so you can choose the right style for your dog.
Use pattern pages that show fabric requirements. This helps you buy only what you need — a fat quarter often covers small to medium sizes. Download patterns that include step photos or printable instructions to avoid guesswork.
Join sewing groups or forums to get feedback on fitting and fabric choice. Members often share tweaks for collars, ties, and reinforcement methods that work with DIY dog bandana projects.
Bookmark a few pattern sources and organize them in a folder so you can reuse or resize templates quickly for future projects.