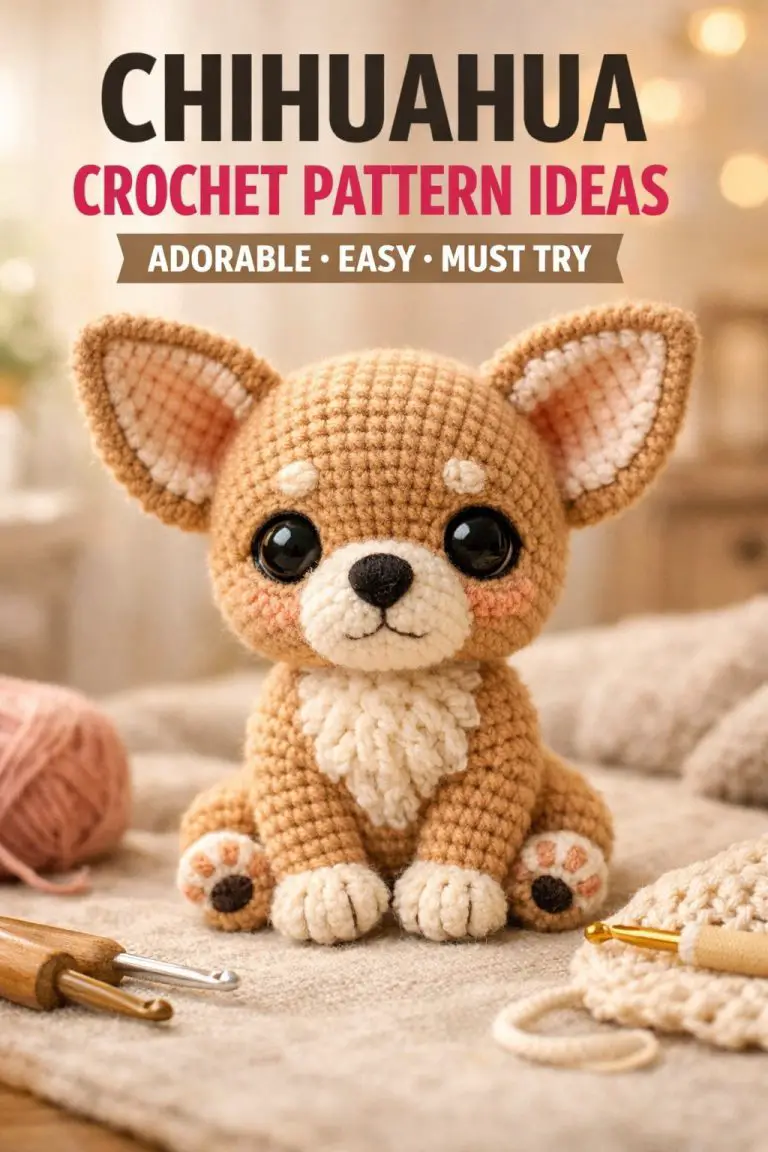
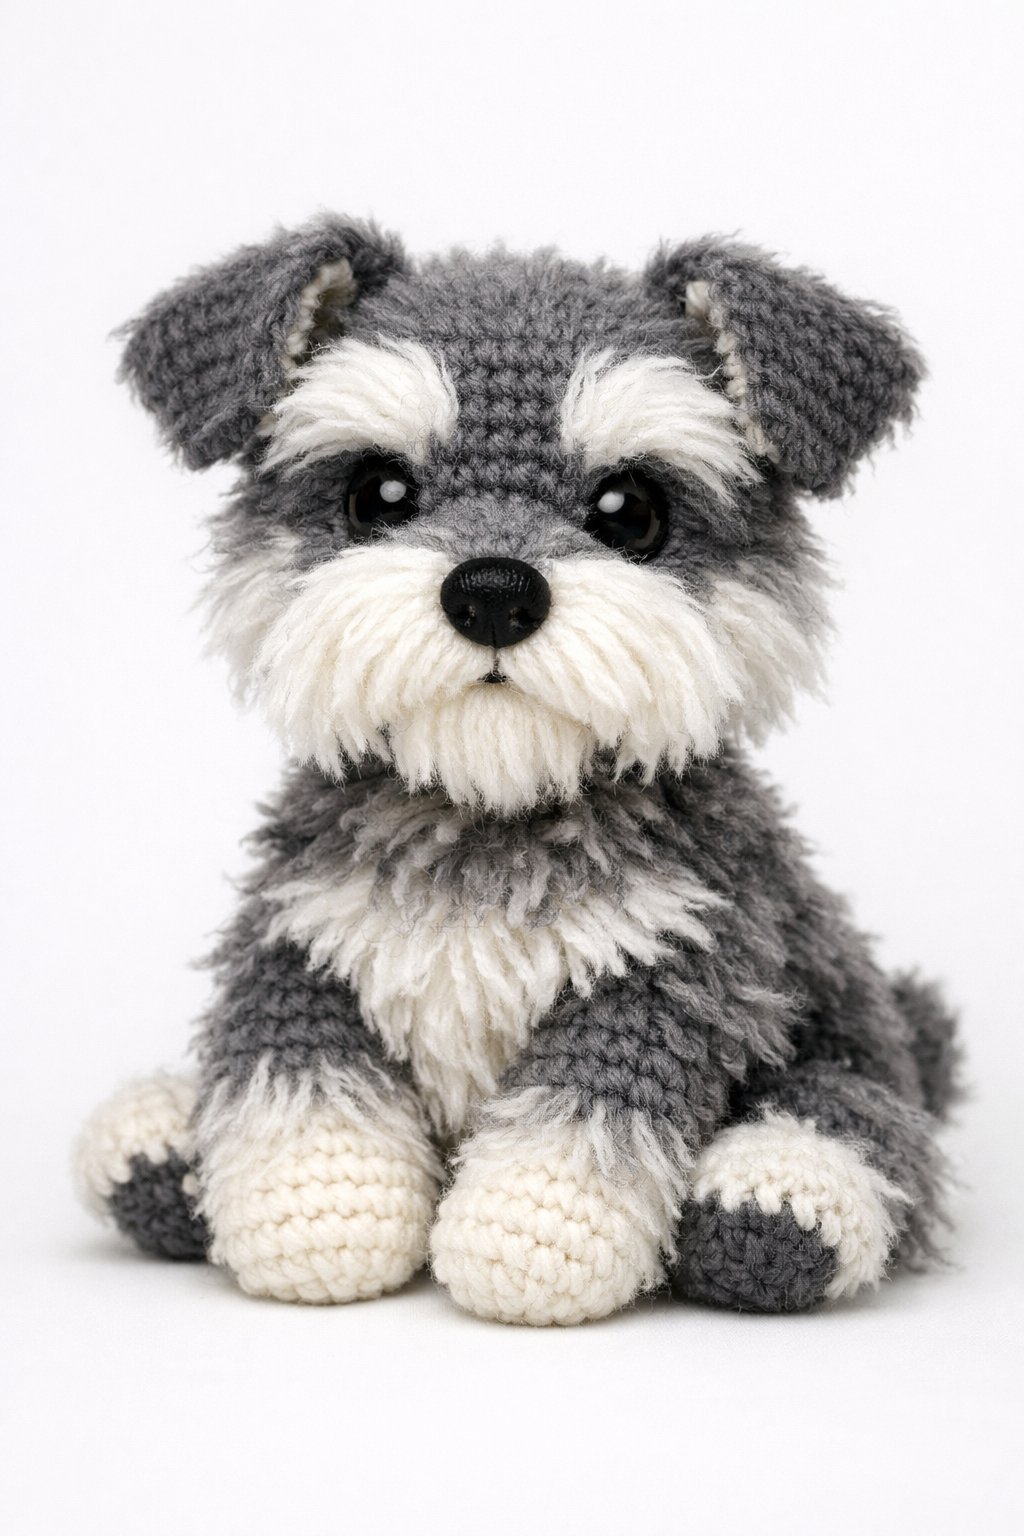
AMIGURUMI SCHNAUZER DOG WITH FUR: Six Expert Design Tips
An amigurumi Schnauzer dog with fur blends a simple crochet base with textured details that give the dog its classic beard and coat. This article explores how crafters shape a small dog figure and add fur that looks full without losing structure.
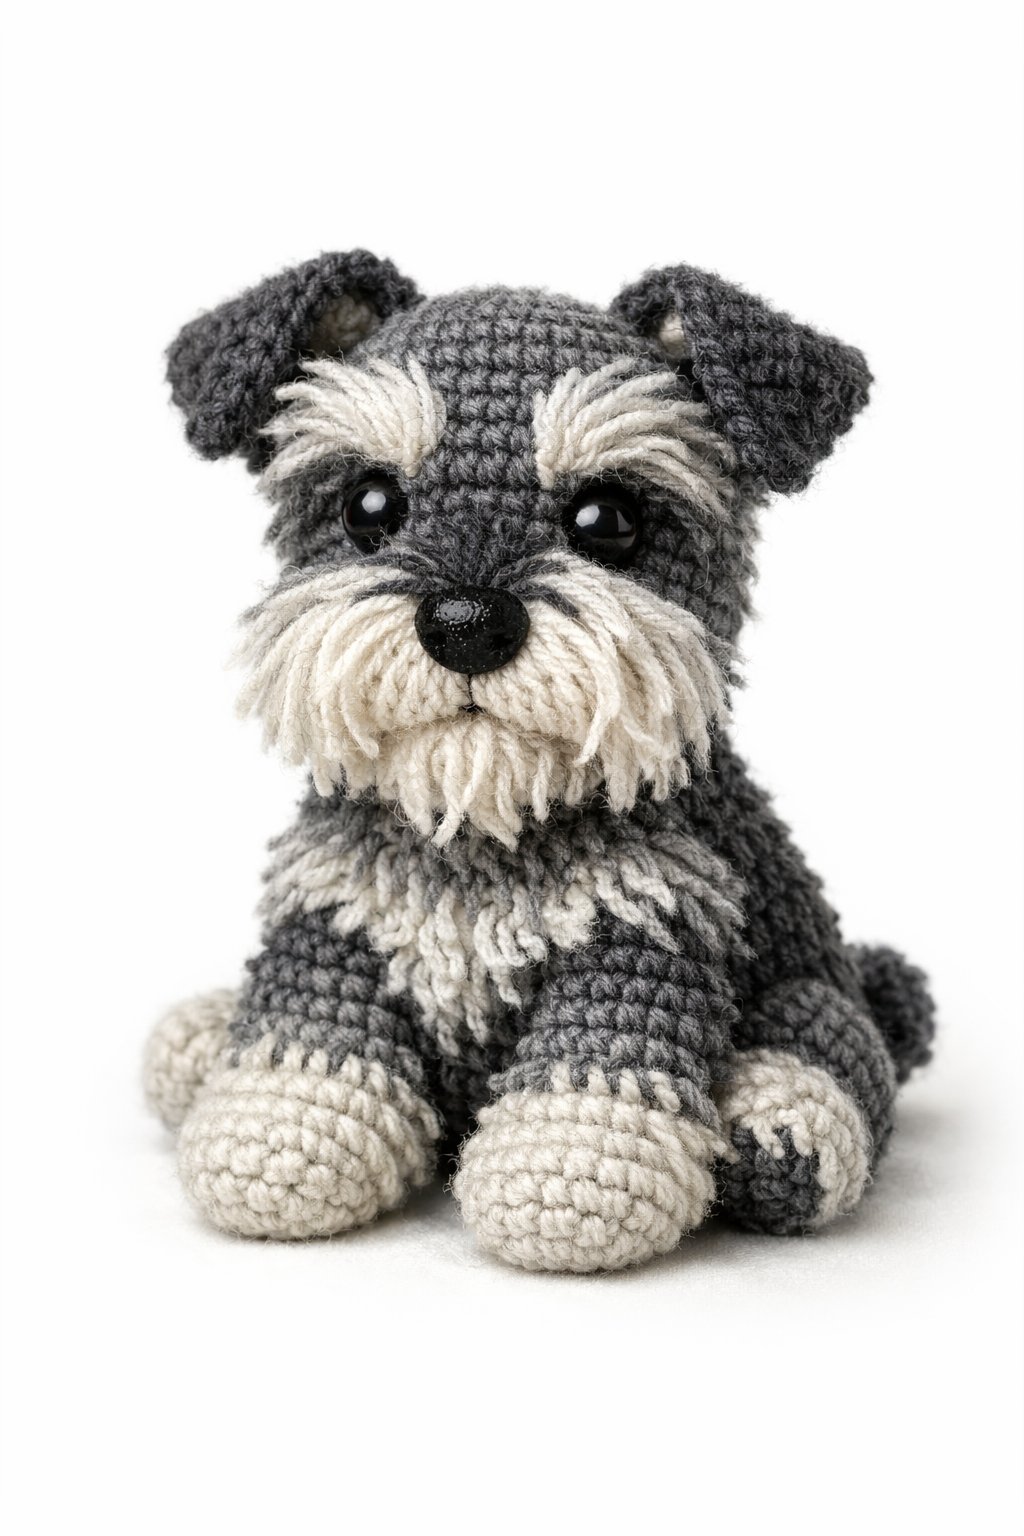
It shows how a clear pattern, the right tools, and focused fur methods help create a Schnauzer amigurumi that looks realistic and stands about hand‑sized when finished. The guide moves from basic body work to more detailed surface techniques, so makers can plan materials, manage skill levels, and build confidence as the project comes together.
1) Free crochet pattern for an ultra cute amigurumi Schnauzer dog with DIY fur
This free crochet pattern shows how to make a small Schnauzer dog with a soft, furry look. It uses basic amigurumi shapes and clear steps.
The pattern includes a simple method to add DIY fur. The fur technique builds texture with yarn loops and light trimming.
Many versions suit beginners and calm projects. The instructions often include photos to guide each step.
Crafters can adjust color and size to match a real Schnauzer. The finished dog works well as a toy or gift.
2) Step-by-step tutorial for creating realistic fur on your Schnauzer amigurumi
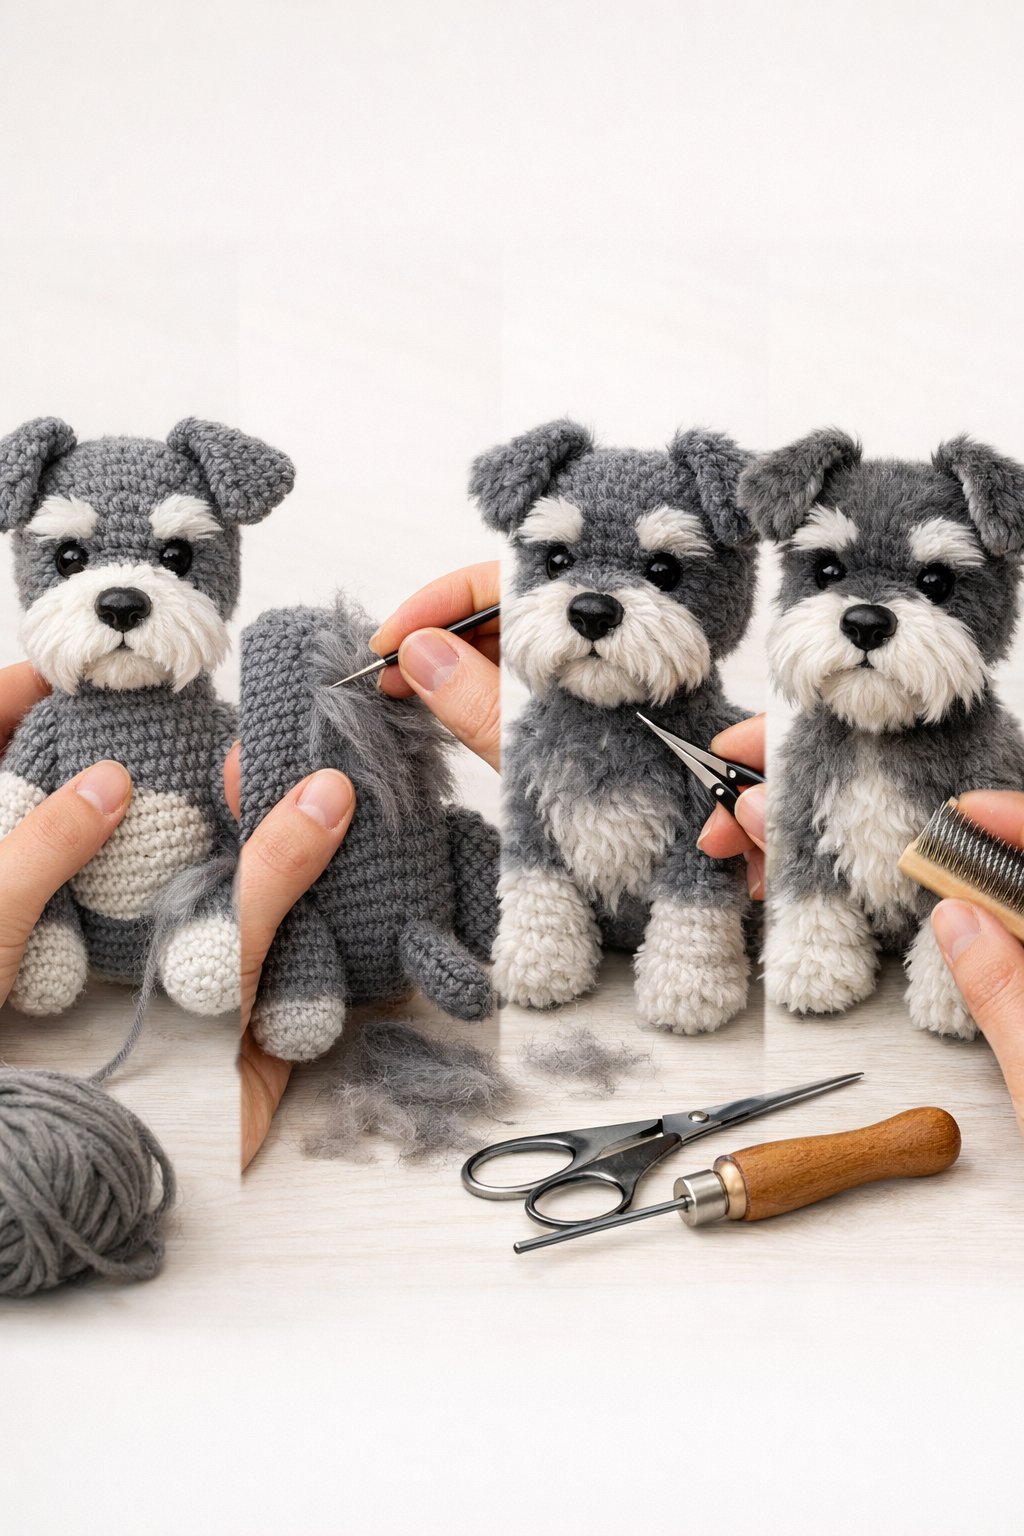
They start by choosing a soft yarn that matches the Schnauzer’s coat. Acrylic or brushed yarn works well and stays easy to cut and shape.
They cut short strands and attach them one by one with a latch hook or small crochet hook. They work in rows, starting at the legs and moving up the body.
They keep the beard, eyebrows, and legs longer than the back. This step helps shape the Schnauzer’s classic look.
They trim the fur with small scissors to even it out. They brush the yarn gently to soften the texture and remove loose fibers.
3) Beginner-friendly body construction with advanced fur techniques
The pattern builds the body with simple shapes and basic stitches. It uses single crochet in the round to form the head, legs, and torso. Clear shaping keeps the structure easy to follow.
The challenge comes from the fur. The maker adds texture after the body is complete, often by attaching yarn strands or working special loops. This step needs patience and steady hands.
This mix lets beginners finish the body with confidence. More experienced skills appear only during the fur stage, not at the start.
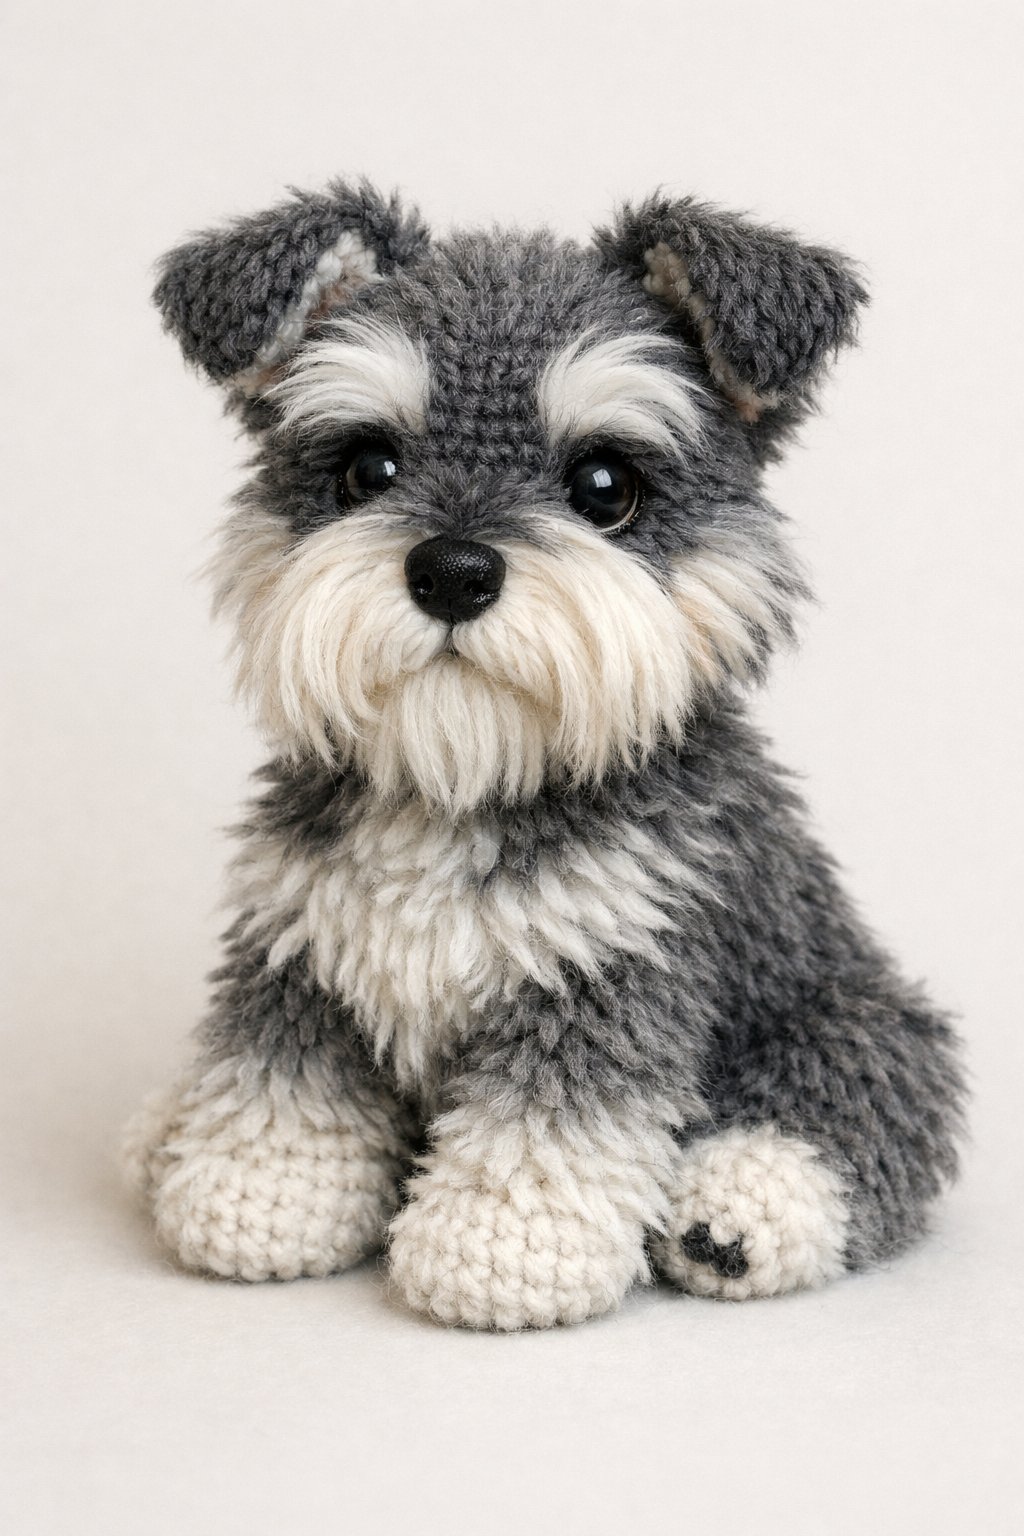
4) Using faux yarn fur for soft and dapper Schnauzer texture
Faux fur yarn gives the Schnauzer a soft coat and a clean, dapper look. It works well for the beard, eyebrows, and leg trim that define the breed.
The yarn can hide stitches, so the maker should count stitches by feel. A simple stitch pattern helps keep the shape clear.
Many patterns add the fur after the body is done. This method allows better control of length and placement.
Short, trimmed sections keep the dog neat. Longer strands suit the beard and brows without adding bulk.
5) Recommended 3.00mm hook size for the optimal crocheting experience
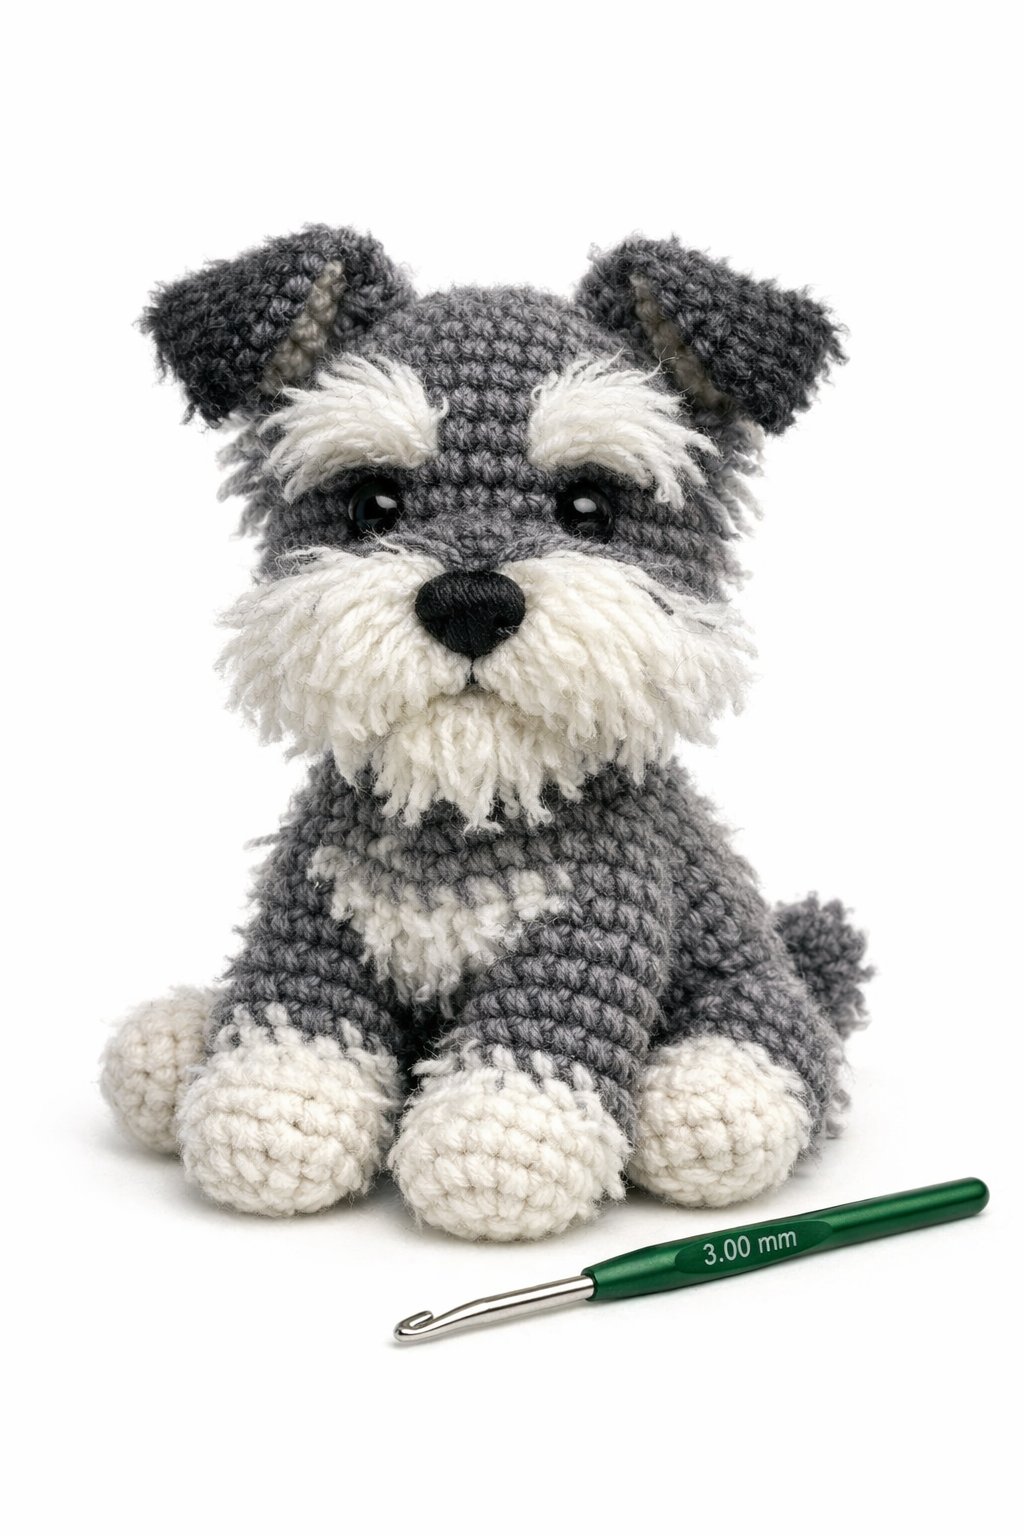
A 3.00mm hook gives this amigurumi schnauzer tight, even stitches. It helps shape the head, legs, and body without gaps.
The smaller hook keeps stuffing inside and supports firm structure. This matters for a dog design with clear features.
When adding fur details, the 3.00mm hook keeps loops controlled. It lets the texture sit neatly without losing stitch definition.
Many crocheters choose this size for amigurumi because it balances control and comfort.
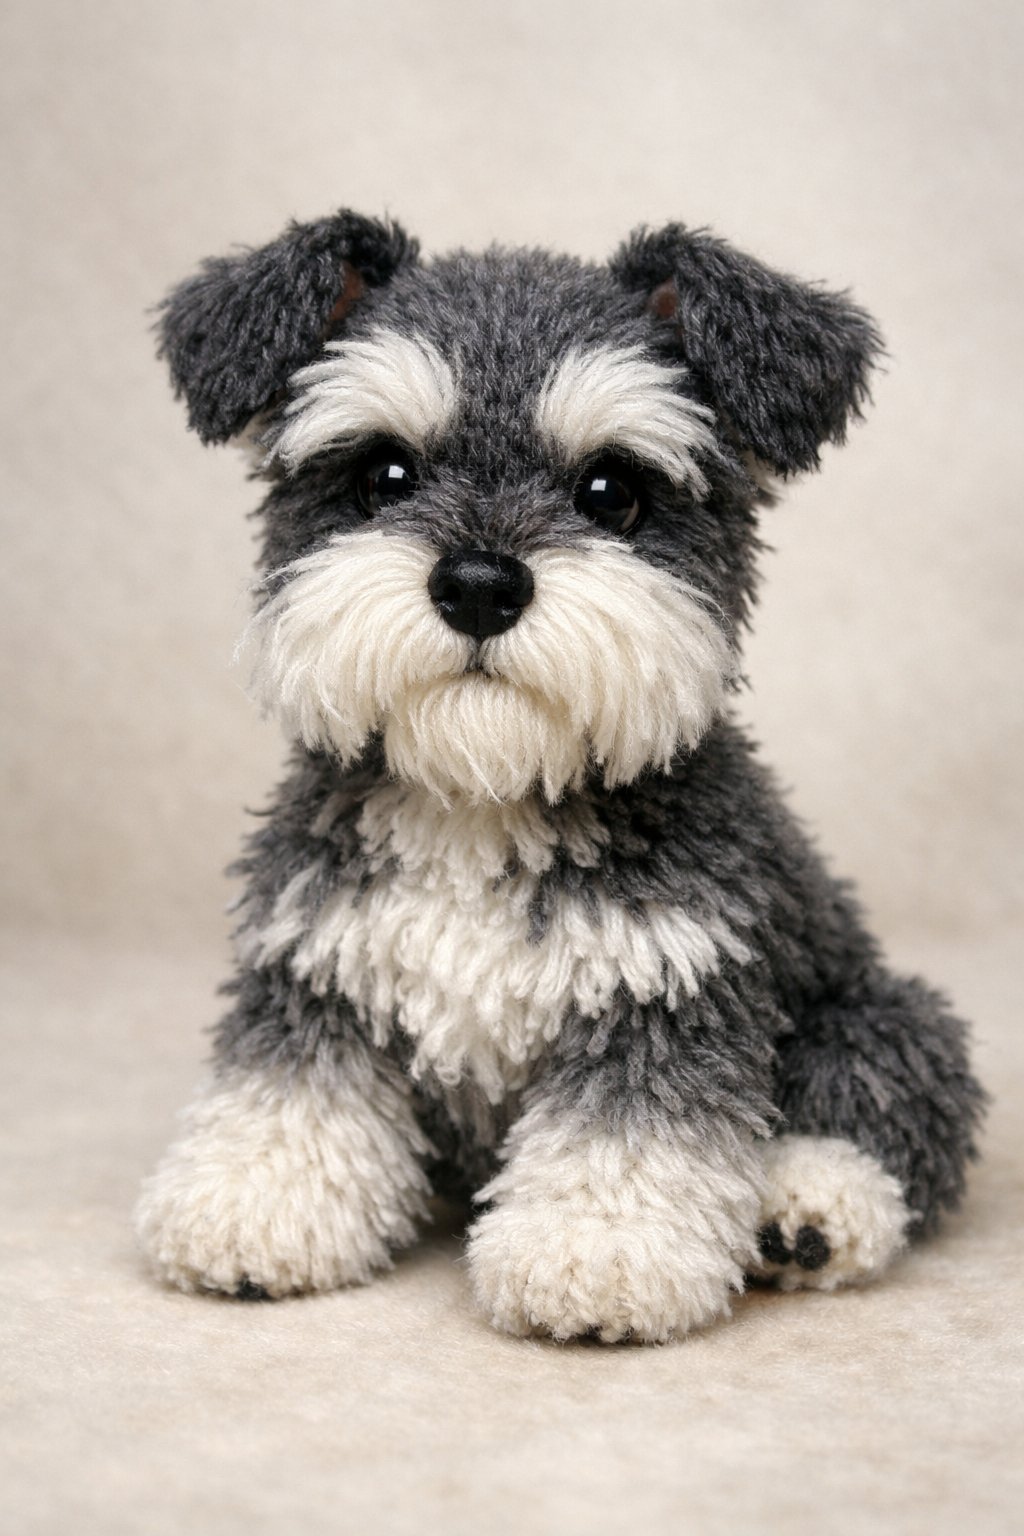
6) Schnauzer amigurumi finished size approximately 25cm tall
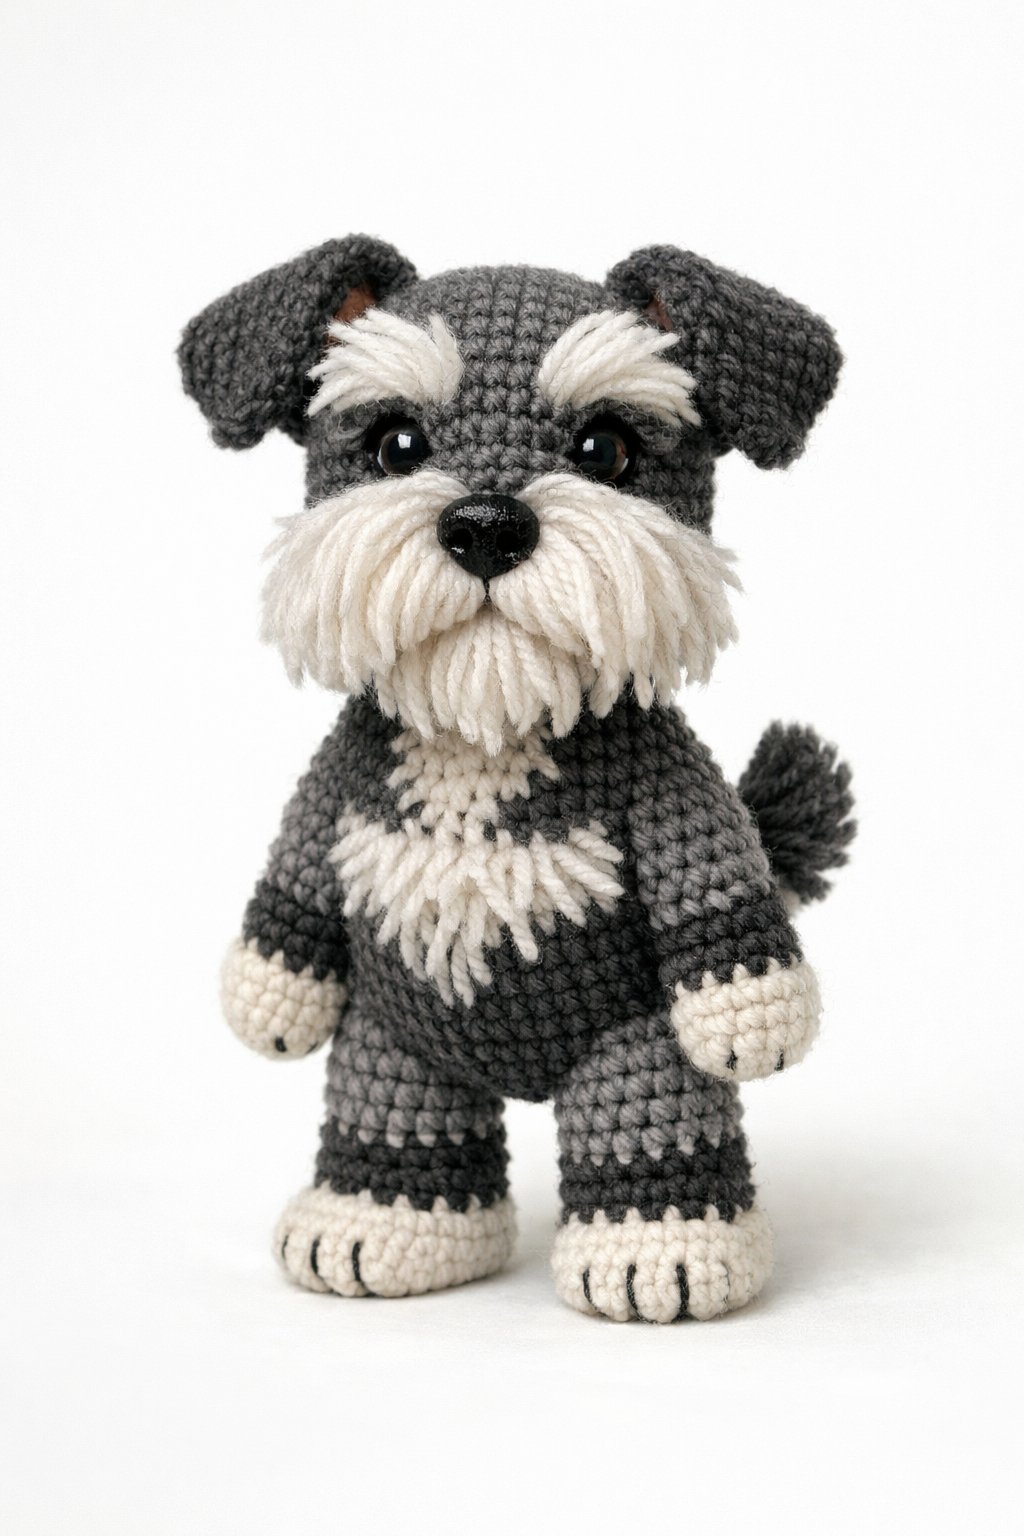
The finished Schnauzer amigurumi stands about 25 cm tall from feet to ears. This size fits well as a display piece or a soft toy.
At this height, the body keeps clear proportions. The legs look sturdy, and the head has enough space for the beard and eyebrows.
The size works well with common yarn weights and standard crochet hooks. Small changes in tension or yarn type may cause minor size differences.
The finished height also allows room for detailed fur work. Brushing and shaping stay easy without making the piece too large.
Choosing Materials for Amigurumi Schnauzer Dog With Fur
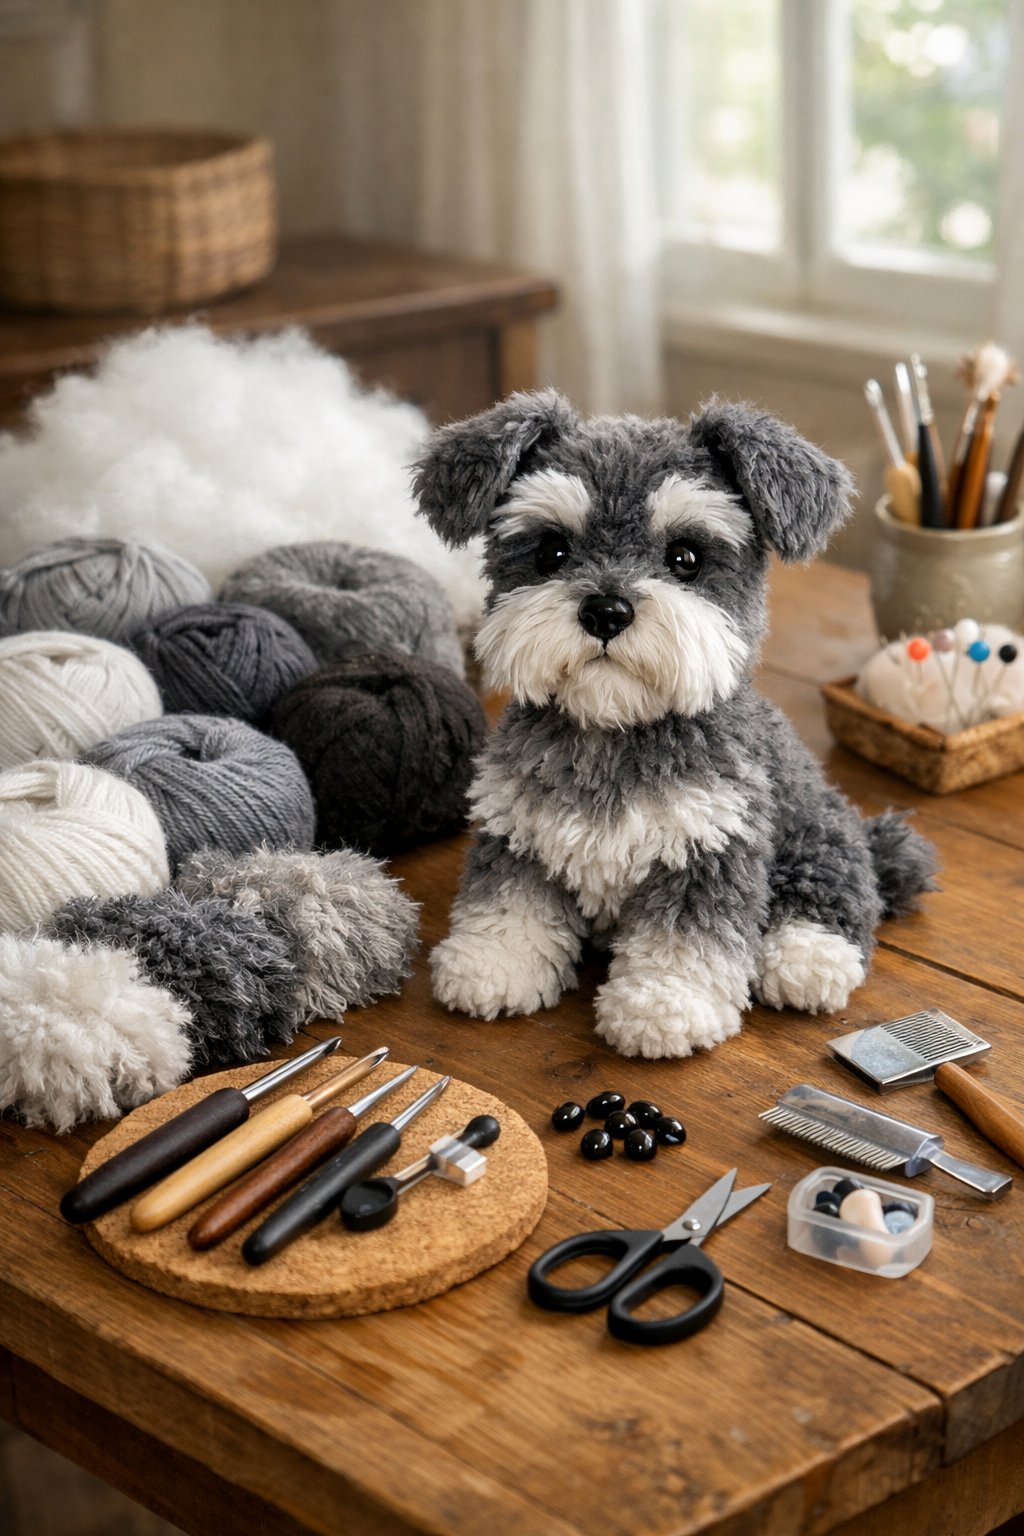
The right materials shape the look and feel of a Schnauzer amigurumi. Yarn choice affects fur texture, while hooks and tools control stitch size and clean details.
Selecting Yarn Types for Fur Texture
Schnauzers have wiry fur with a soft undercoat. Makers often use two yarn types to match this look.
- Body yarn: Smooth worsted-weight acrylic or cotton creates firm stitches and clear shaping. Gray, salt-and-pepper, or black work well.
- Fur yarn: Faux fur yarn, brushed acrylic, or eyelash yarn adds texture for brows, beard, and legs.
Faux fur yarn gives the most realistic look, but it hides stitches. Brushed acrylic offers better control and still looks fluffy. Cotton blends hold shape but feel less soft.
Helpful tips
- Choose low-shed fur yarn to reduce mess.
- Match fur color slightly lighter than the body for contrast.
- Test a small swatch to check density and feel.
| Part | Yarn Type | Reason |
|---|---|---|
| Body | Worsted acrylic/cotton | Clean shape |
| Face fur | Faux fur or brushed | Realistic texture |
Recommended Crochet Hooks and Tools
Hook size controls stitch tightness, which matters for stuffing and fur hold. Most patterns use 2.75–3.5 mm hooks for worsted yarn. A smaller hook keeps stitches tight and prevents gaps.
Fur yarn often works better with a hook 0.5 mm larger to avoid stiff fabric. Makers switch hooks as needed.
Essential tools
- Sharp scissors for trimming fur evenly
- Metal yarn needle for strong seams
- Stitch markers to track rounds
- Pet slicker brush to fluff brushed yarn
Safety eyes add expression, but embroidery suits toys for children. A locking hemostat helps pull fur yarn through tight stitches without snagging.
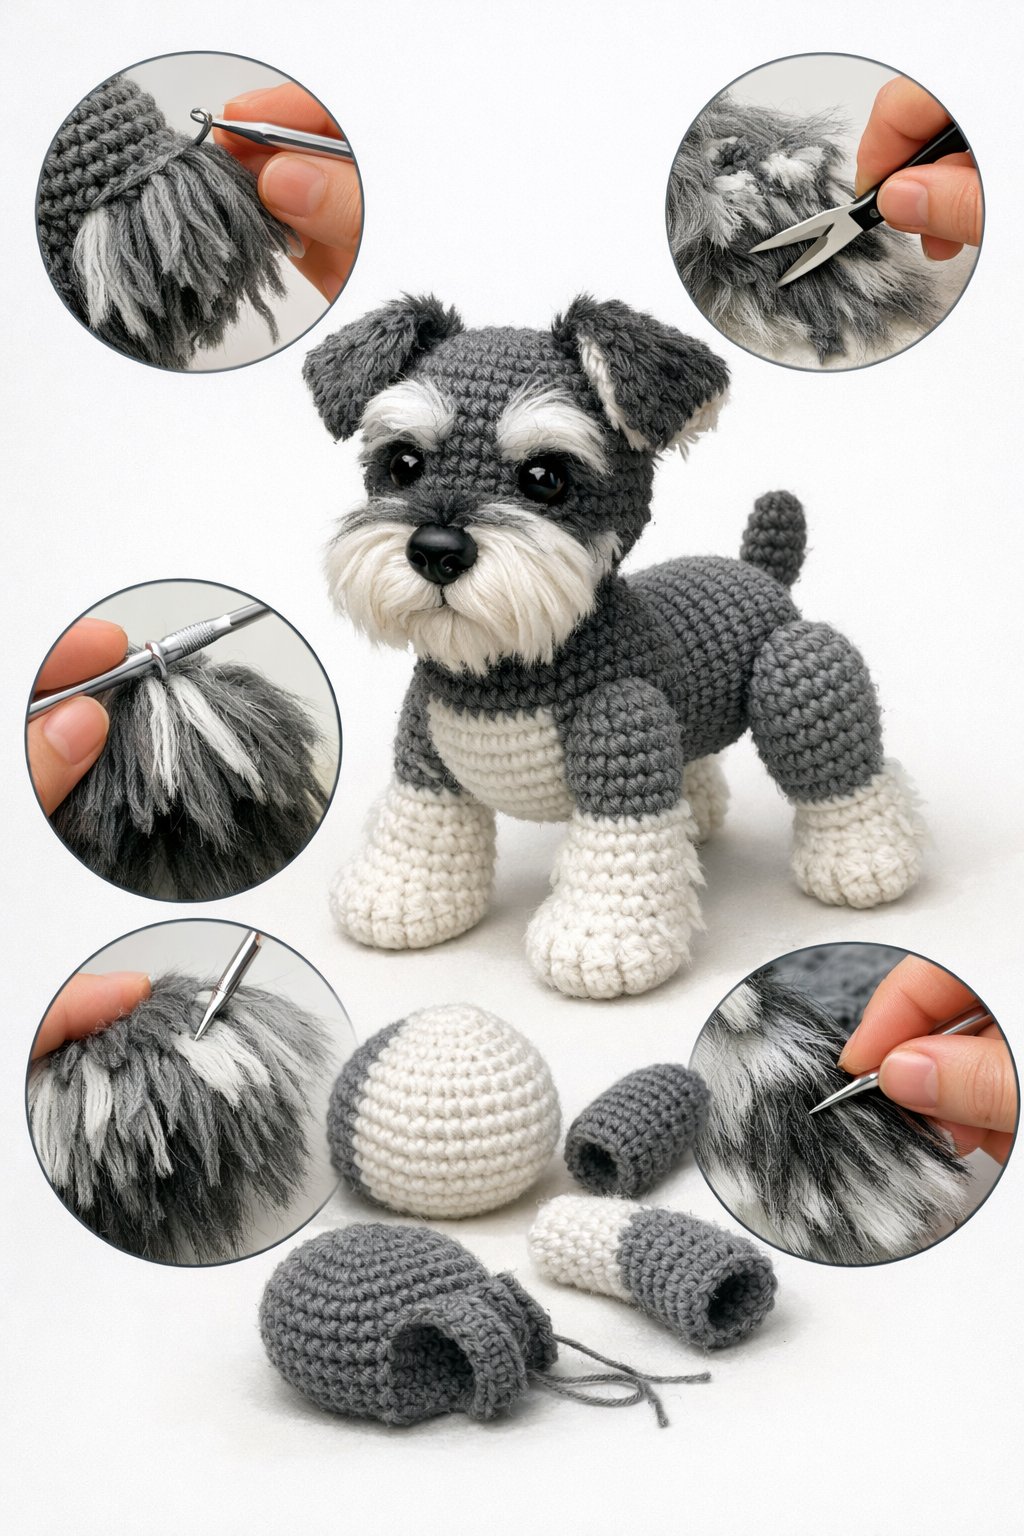
Techniques to Create Realistic Fur Effect
Realistic Schnauzer fur relies on controlled loops and careful finishing. These methods shape the beard, brows, and body texture while keeping stitches strong.
Loop Stitch Methods
Loop stitches create raised strands that look like fur. The maker works loops on the surface while crocheting or adds them after with a hook.
Key steps
- Use soft acrylic or wool yarn for flexible loops.
- Keep loops short on the body and longer on the beard and brows.
- Space loops evenly to avoid thin spots.
Common options
| Method | When to use | Notes |
|---|---|---|
| In-row loop stitch | Body fur | Fast and secure |
| Post-work loops | Face details | Better control |
| Latch-hook loops | Thick coats | Takes more time |
Consistent loop length matters more than speed. Uneven loops make trimming harder and can hide stitch shape.
Brushing and Trimming for Shaggy Fur
Brushing opens the yarn fibers and softens the look. A pet slicker brush or fine wire brush works best.
Brush in short strokes. Start light and increase pressure as needed. Focus on the beard, legs, and chest where Schnauzers show texture.
Trimming shapes the fur. Use small sharp scissors and cut a little at a time.
- Round the brows.
- Taper the beard.
- Keep the back shorter than the sides.
Trim only after brushing. Brushed fibers show true length and prevent uneven cuts.